Autel MaxiSys scanners difference MS908S Pro vs MS908P vs MS908
The main difference of Autel Scanner MS908S Pro, Autel MS908P and Autel MS908 is:
– Functions:
MS908S Pro and MS908P comes with J2534 ecu programmer so that both are able to do programming.
But MS908 only works for diagnostic tests for universal vehicles.
– Hardware:
The new MS908S Pro is updated a lot in hardware design, which will run faster and much more stable to work with vehicles in tests.
http://forobd2.seesaa.net/article/461539986.html?1536329420
The main difference of Autel Scanner MS908S Pro, Autel MS908P and Autel MS908 is:
– Functions:
MS908S Pro and MS908P comes with J2534 ecu programmer so that both are able to do programming.
But MS908 only works for diagnostic tests for universal vehicles.
– Hardware:
The new MS908S Pro is updated a lot in hardware design, which will run faster and much more stable to work with vehicles in tests.
| Specification/Autel tools | Autel MS908S Pro | Autel MS908P | Autel MS908 |
| Image | 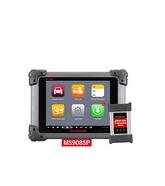 |
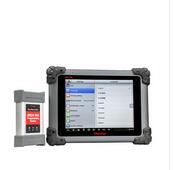 |
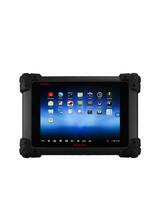 |
| Operating System | AndroidTM 4.4.2, KitKat | ndroidTM 4.0, Ice Cream Sandwich | AndroidTM 4.0, Ice Cream Sandwich |
| Processor | Samsung Exynos Six-core Processor (1.3GHz Quad-core ARM Cortex-A7 + 1.7GHz Dual-core ARM Cortex-A15) | Samsung Exynos Quad-Core Processor 1.4GHz | Samsung Exynos Quad-Core Processor 1.4GHz |
| Memory | 2GB RAM &64GB On-board Memory | 2GB RAM & 32GB On-board Memory | 2GB RAM & 32GB On-board Memory |
| Display | 9.7 inch LED capacitive touch screen with 1024×768 resolution | 9.7 inch LED capacitive touch screen with 1024x768P resolution | 9.7 inch LED capacitive touch screen with 1024x768P resolution |
| Connectivity | Wi-Fi: 802.11 a/b/g/n/acUSB: 2.0
Bluetooth: v.2.1 + EDR SD Card: Support up to 32GB HDMI |
Ethernet: RJ45 Ethernet Connection,Cellular: 3G/4G module: WCDMA | Ethernet: RJ45 Ethernet Connection,Cellular: 3G/4G module: WCDMA |
| Camera (rear) | 8.0 Megapixel, AF with Flashlight | Rear-facing, 5.0 Mexgapixel, AF with Flashlight | Rear-facing, 5.0 Mexgapixel, AF with Flashlight |
| Sensors | Gravity Accelerometer, Ambient Light Sensor (ALS) | Gravity Accelerometer, Ambient Light Sensor (ALS) | Gravity Accelerometer, Ambient Light Sensor (ALS) |
| Audio Input/Output | MicrophoneDual Speakers 3-Band 3.5 mm stereo/standard headset jack | Microphone, Dual Speakers, 4-Band 3.5 mm stereotype/standard headset jack | Microphone, Dual Speakers, 4-Band 3.5 mm stereotype/standard headset jack |
| Power and Battery | 11000 mAh 3.7 V lithium-polymer batteryCharging via 12 V AC/DC power supply with the temperature between 0°C and 45°C | 11000 mAh 3.7 V lithium-polymer battery, Charging via 12 V vehicle power | 11000 mAh 3.7 V lithium-polymer battery, Charging via 12 V vehicle power |
| Input Voltage | 12 V (9-24 V) | 12 V (9-24 V) | 12 V (9-24 V) |
| Power Consumption | 6.5 W | 6.5 W | 6.5 W |
| Operating Temperature | 0 to 50°C (32 to 122°F) | -10 to 55 ℃ (14 to 131 ℉) | -10 to 55 ℃ (14 to 131 ℉) |
| Storage Temperature | -20 to 60°C (-4 to 140°F) | -20 to 70 ℃ (-4 to 158 ℉) | -20 to 70 ℃ (-4 to 158 ℉) |
| Housing | Unique ergonomic design with rubberized outer protection and a rugged internal housing | Strong plastic housing with protective rubber boot | Strong plastic housing with protective rubber boot |
| Dimensions (W x H x D) | 300 mm (11.81”) x 220 mm (8.66”) x 50 mm (1.97”) | 300 mm (11.81”) x 220 mm (8.66”) x 50 mm (1.97”) | 300 mm (11.81”) x 220 mm (8.66”) x 50 mm (1.97”) |
| Weight | NW: 1.42 kg (3.13 lb.) GW: 8.052 kg (17.75 lb.) | NW: 1.42 kg (3.13 lb), MaxiSys GW: 8.655 kg (19.08 lb) / MaxiSys Pro GW: 8.052 kg (17.75 lb) | NW: 1.42 kg (3.13 lb), MaxiSys GW: 8.655 kg (19.08 lb) / MaxiSys Pro GW: 8.052 kg (17.75 lb) |
Comments
Post a Comment