GM reflashing instruction using Mangoose Pro GM 2:
GM products are one of the easiest to reflash. You do not need a factory hardware to use the factory software to reflash any module on the vehicle. You can take a Drew Tech Mongoose II (original) or a Mangoose Pro GM II (china clone of high quality) in the shop, because it doubles as the factory interface for vehicles that use the Tech 2, as well.
After paying for the subscription ($55 for three days) and choosing SPS (Service Programming System), simply choose the Mangoose cable and start reflashing.
Model example: Chevrolet Suburban 2007
This is the how-to’s:
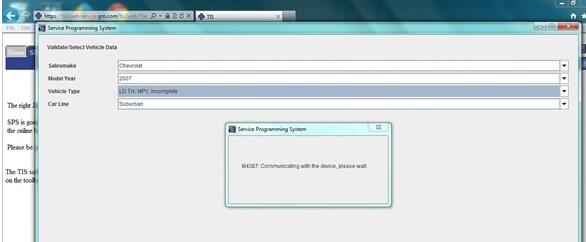
Step 1: Enter in all of the parameters that describe the vehicle. Always remember to click “Next” on the bottom right of the screen.

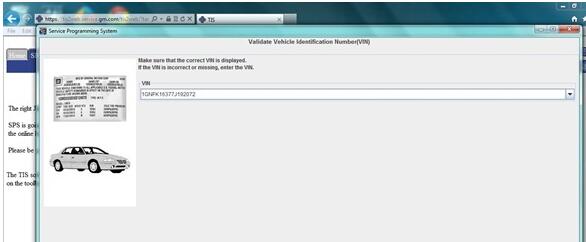
Step 2: Double check you have the right VIN.

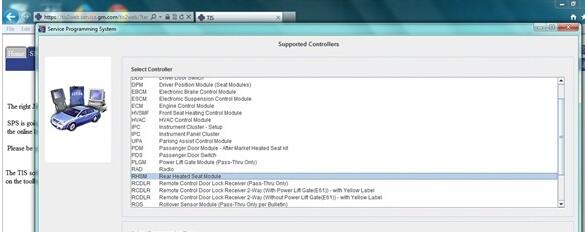
Step 3: Choose the module you want to reprogram. Only reprogram a module in response to a TSB

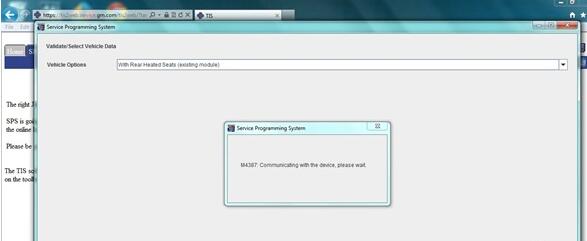
Step 4: Usually, the program will give you options for different software depending upon what options the vehicle has. When in doubt, call your parts guy at the dealer.

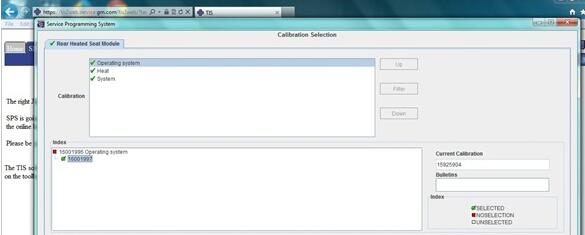
Step 5: The current calibration is to the right while the new one is to the left on the bottom of the list of Calibration IDs.

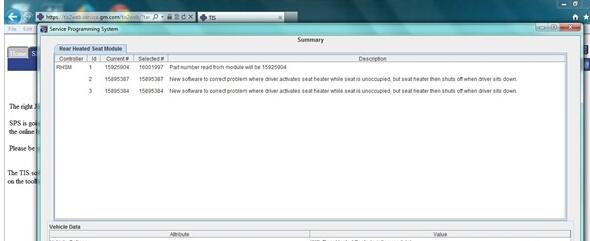
Step 6: Right before you begin the reflash, SPS tells you what the Calibration IDs will actually correct. This is a good way to verify that you will actually be addressing the issue at hand.

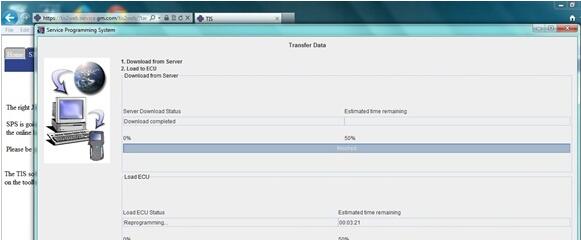
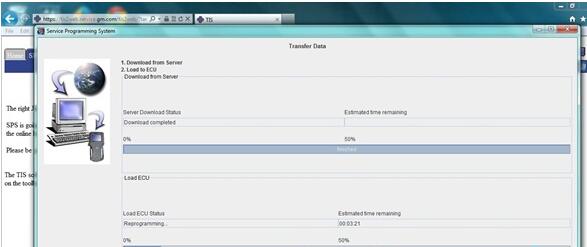
Step 7: Always follow any instructions before a reflash! For older GMs, you might have to pull fuses to modules (commonly the ABS and BCM) in order to avoid reflash failures.

That’s all about GM reflash process. If the process freezes up or fails, don’t panic. GM modules generally can be reflashed until you get them right. Believe it or not, a fast computer might do a bad job reflashing an old GM. Just keep trying to reflash the vehicle, and if you have to open a bunch of other programs in the background to slow down the computer.

GM products are one of the easiest to reflash. You do not need a factory hardware to use the factory software to reflash any module on the vehicle. You can take a Drew Tech Mongoose II (original) or a Mangoose Pro GM II (china clone of high quality) in the shop, because it doubles as the factory interface for vehicles that use the Tech 2, as well.
After paying for the subscription ($55 for three days) and choosing SPS (Service Programming System), simply choose the Mangoose cable and start reflashing.
Model example: Chevrolet Suburban 2007
This is the how-to’s:
Step 1: Enter in all of the parameters that describe the vehicle. Always remember to click “Next” on the bottom right of the screen.
Step 2: Double check you have the right VIN.
Step 3: Choose the module you want to reprogram. Only reprogram a module in response to a TSB
Step 4: Usually, the program will give you options for different software depending upon what options the vehicle has. When in doubt, call your parts guy at the dealer.
Step 5: The current calibration is to the right while the new one is to the left on the bottom of the list of Calibration IDs.
Step 6: Right before you begin the reflash, SPS tells you what the Calibration IDs will actually correct. This is a good way to verify that you will actually be addressing the issue at hand.
Step 7: Always follow any instructions before a reflash! For older GMs, you might have to pull fuses to modules (commonly the ABS and BCM) in order to avoid reflash failures.
That’s all about GM reflash process. If the process freezes up or fails, don’t panic. GM modules generally can be reflashed until you get them right. Believe it or not, a fast computer might do a bad job reflashing an old GM. Just keep trying to reflash the vehicle, and if you have to open a bunch of other programs in the background to slow down the computer.
Comments
Post a Comment