
Benz W204 TCM Programming with Launch X431


Mercedes Benz C200 (W204), after replacing new TCM module and done TCM programming, Teach-in drive authorization system, teach-in selection range sensor, by Launch X431 PAD VX431 Pro3 V4.0, X431 Pad III, X431 Pro V4.0.

launch-x431-benz-w204-tcm-programming-1
launch-x431-benz-w204-tcm-programming-2

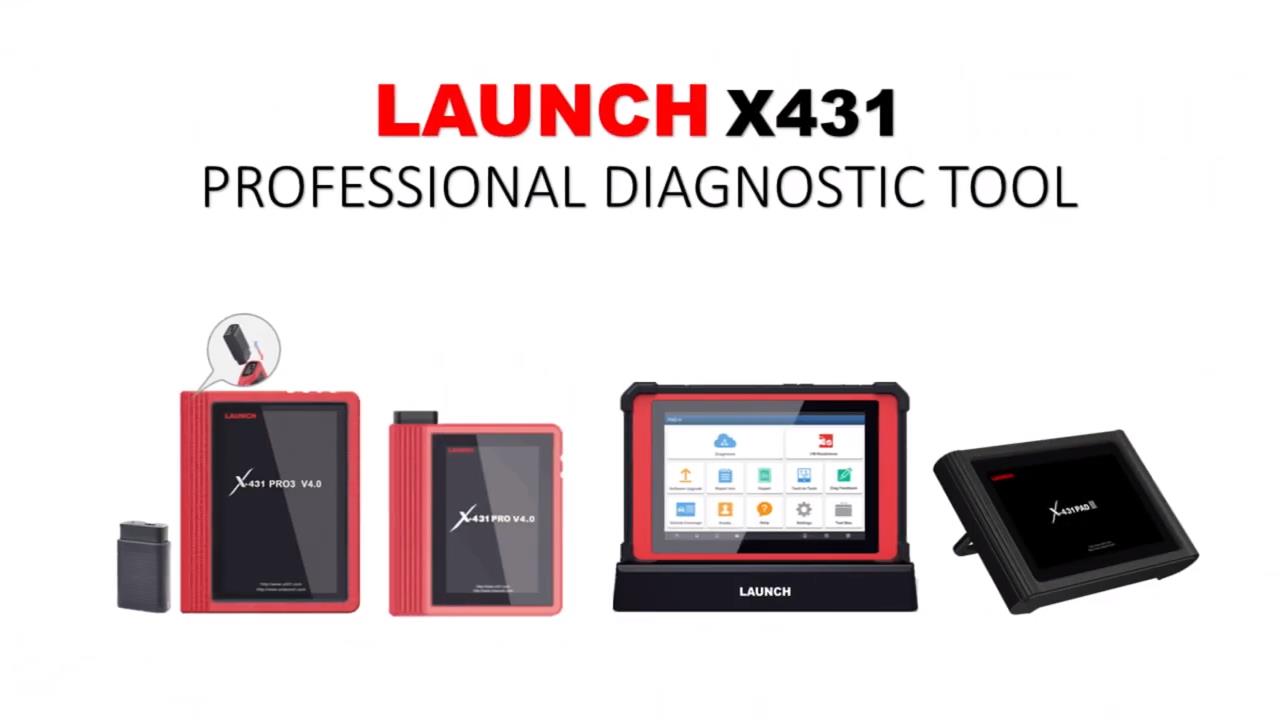
Using X431 PAD V for example.

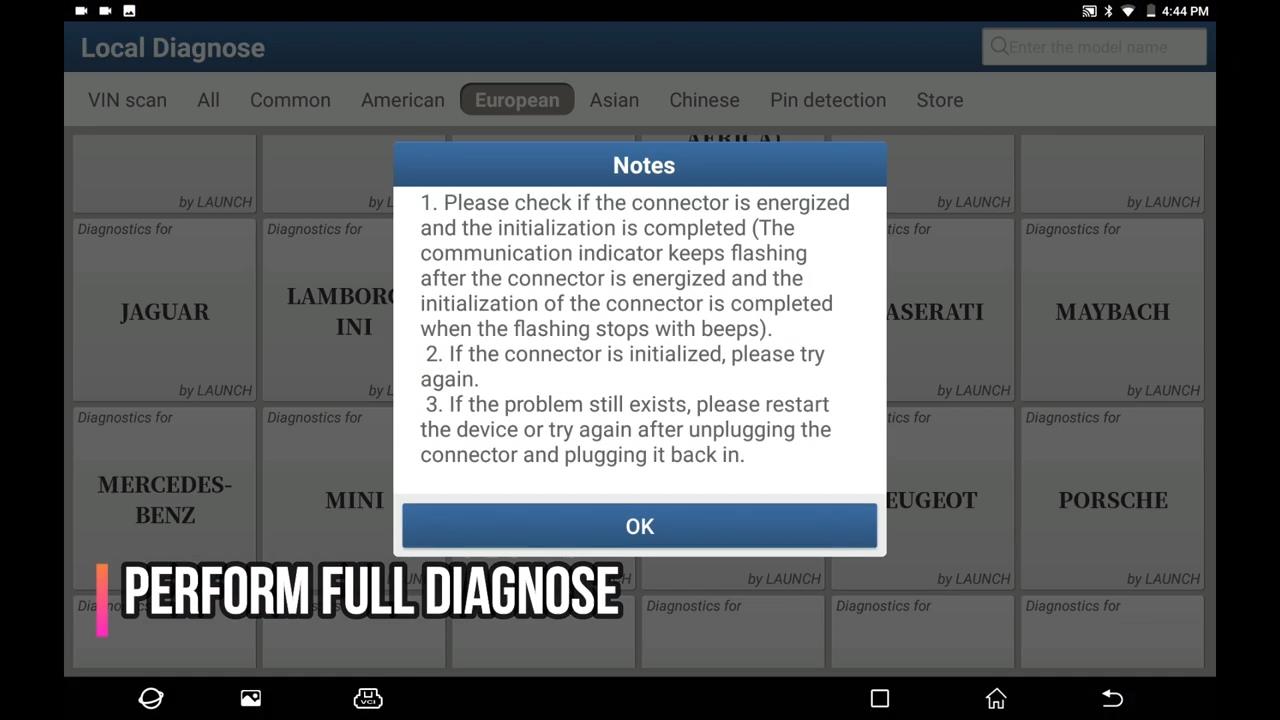
Connect it to the Benz W204, boot it and click on “Diagnosis” and then Mercedes Benz.

Connecting the VCI in Wifi mode.

launch-x431-benz-w204-tcm-programming-3

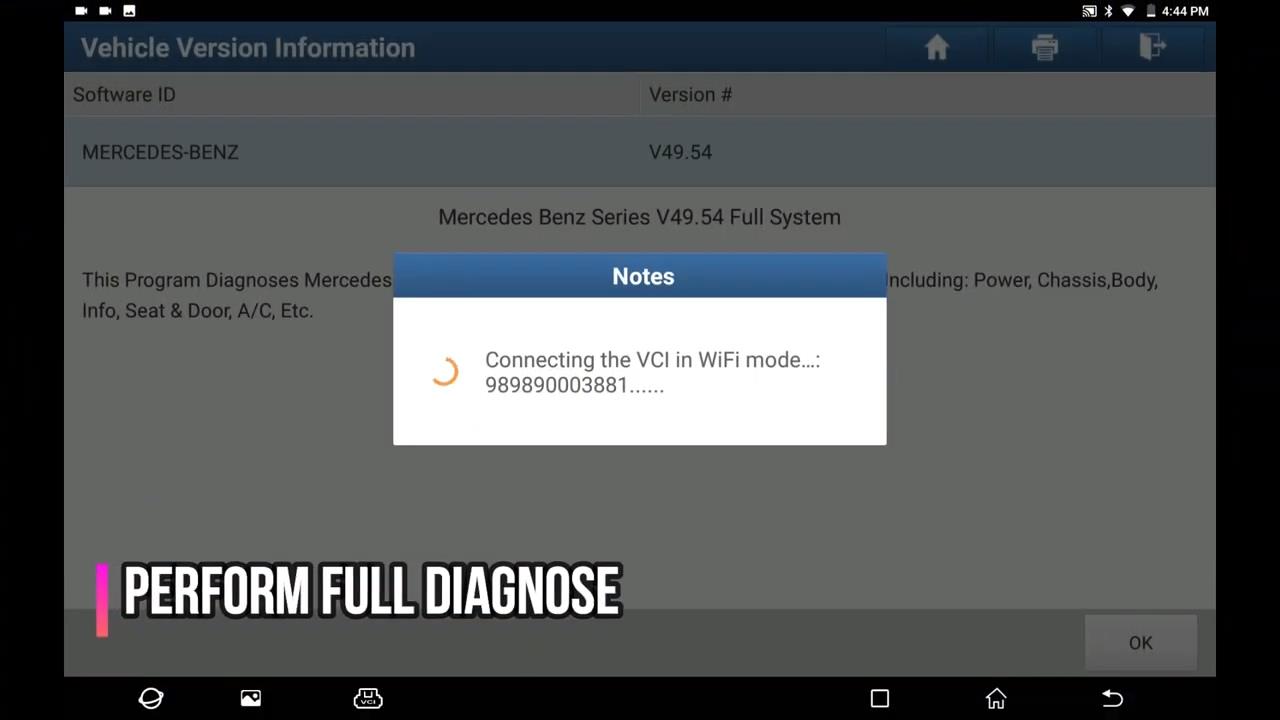
Reading the information of car.

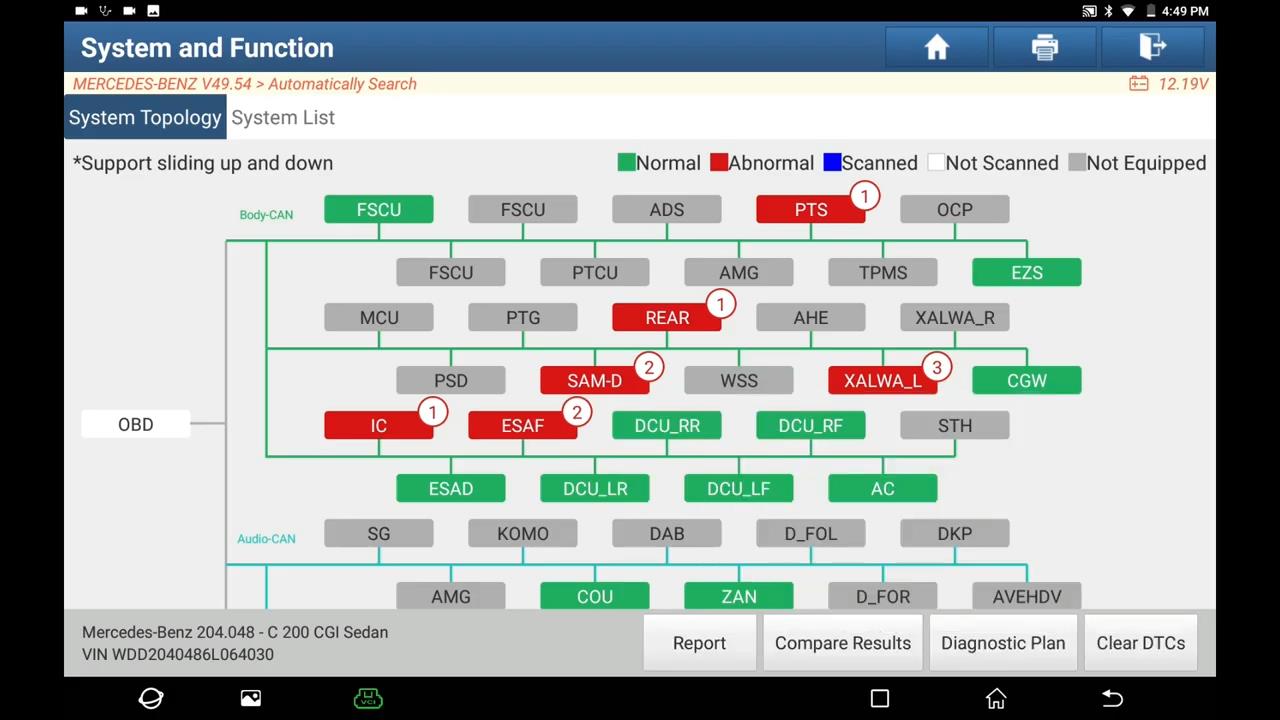
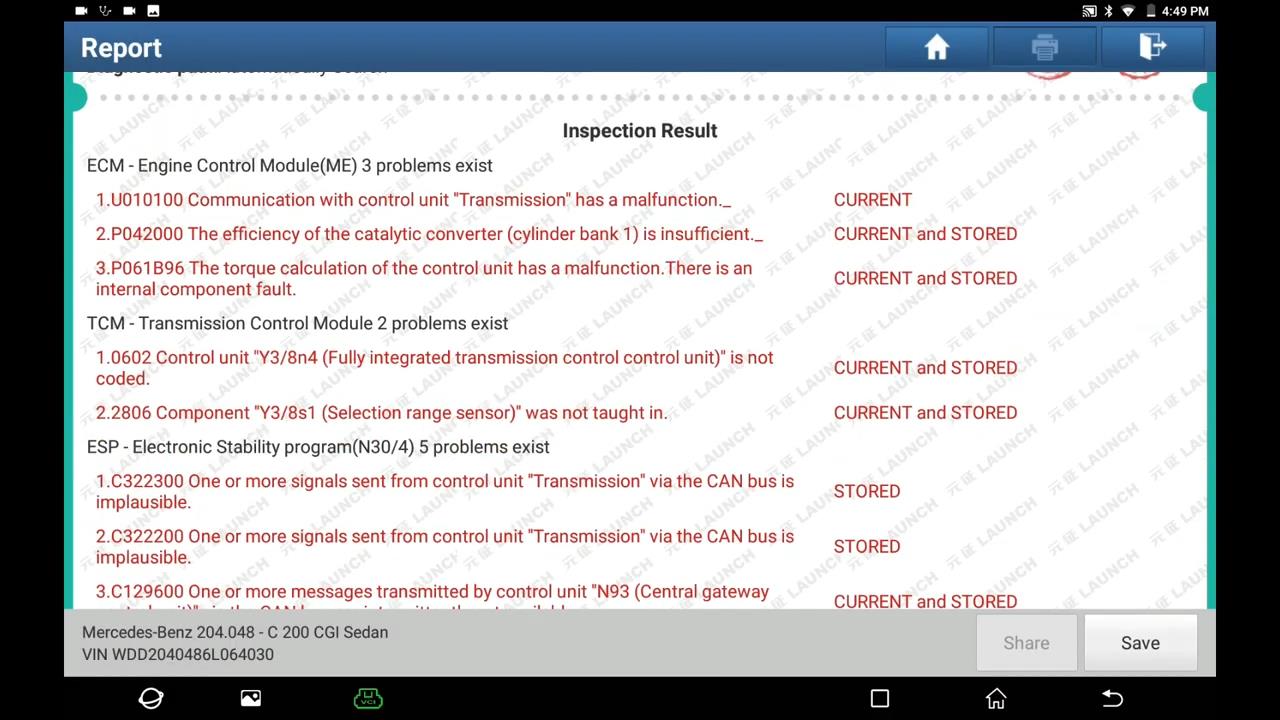
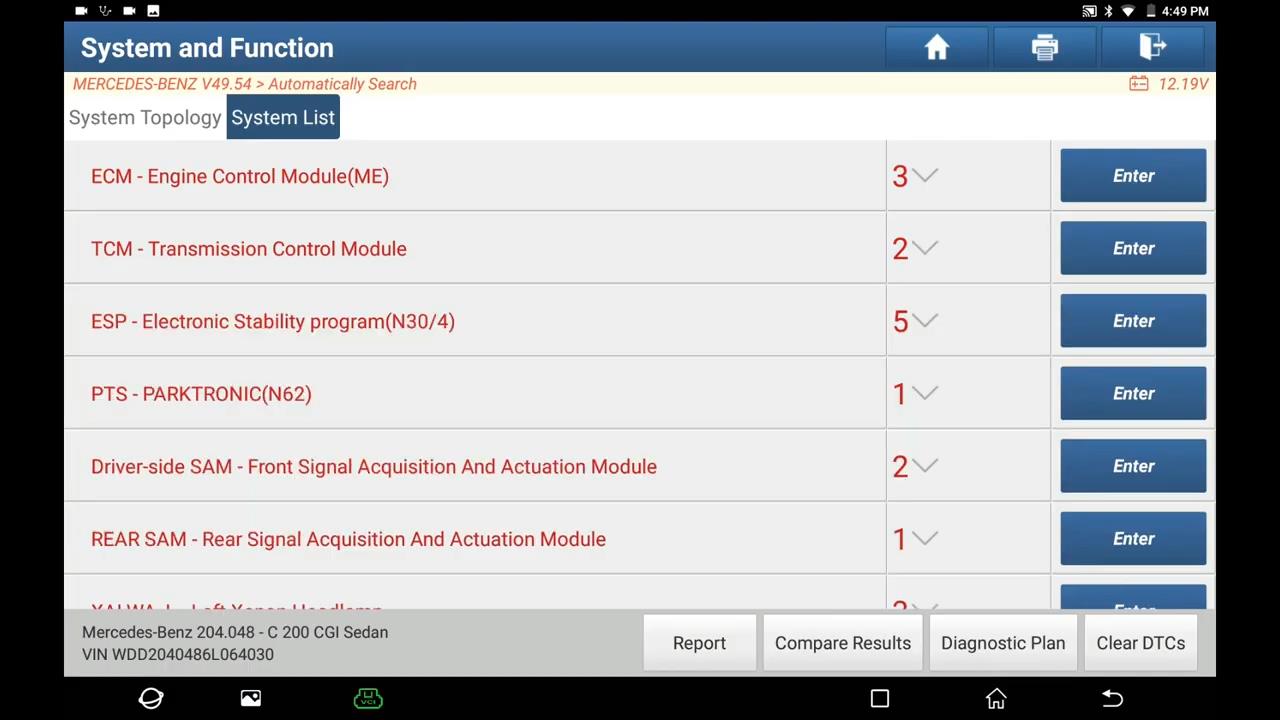
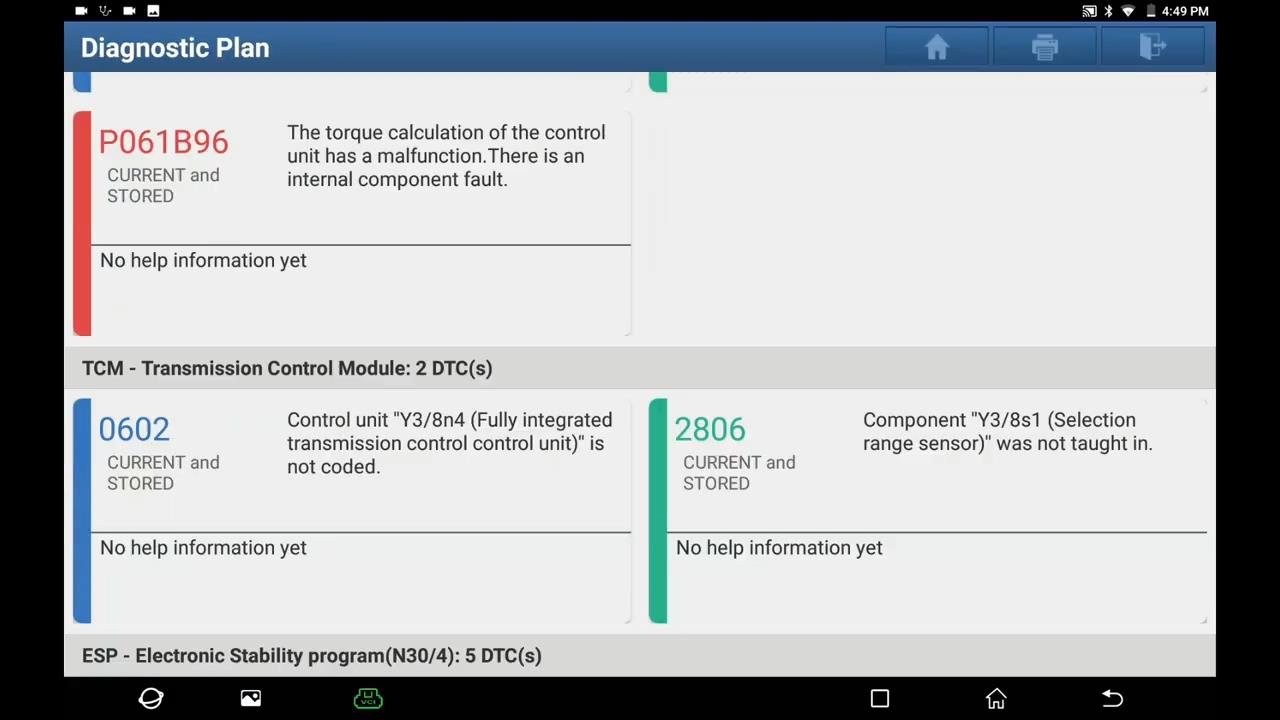
Automatically search and scan and then generate report.

launch-x431-benz-w204-tcm-programming-4
launch-x431-benz-w204-tcm-programming-5
launch-x431-benz-w204-tcm-programming-6
launch-x431-benz-w204-tcm-programming-7
launch-x431-benz-w204-tcm-programming-8

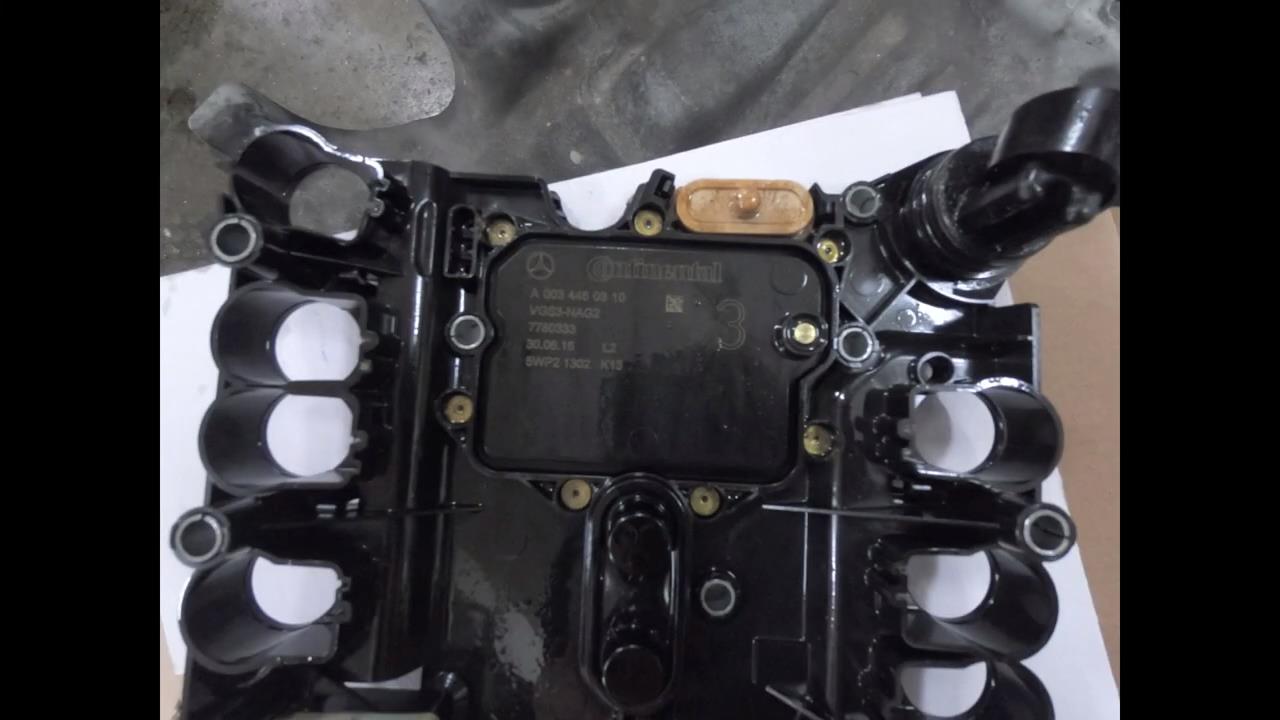
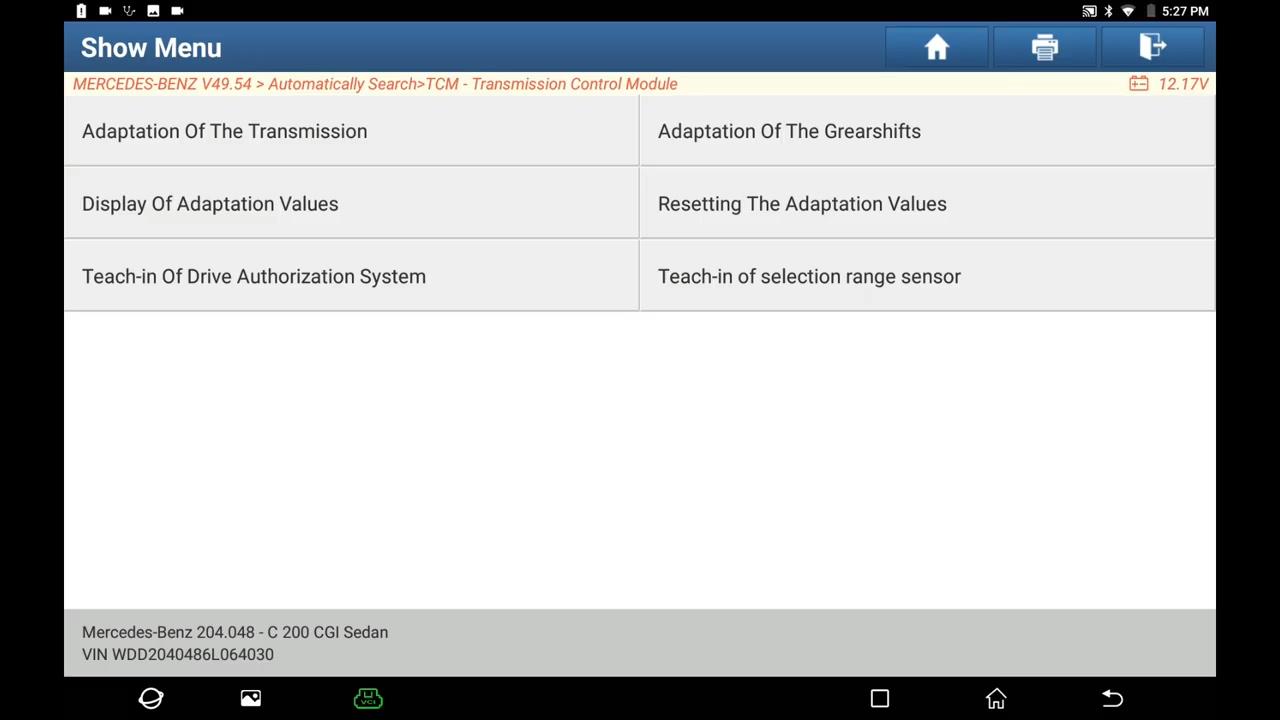
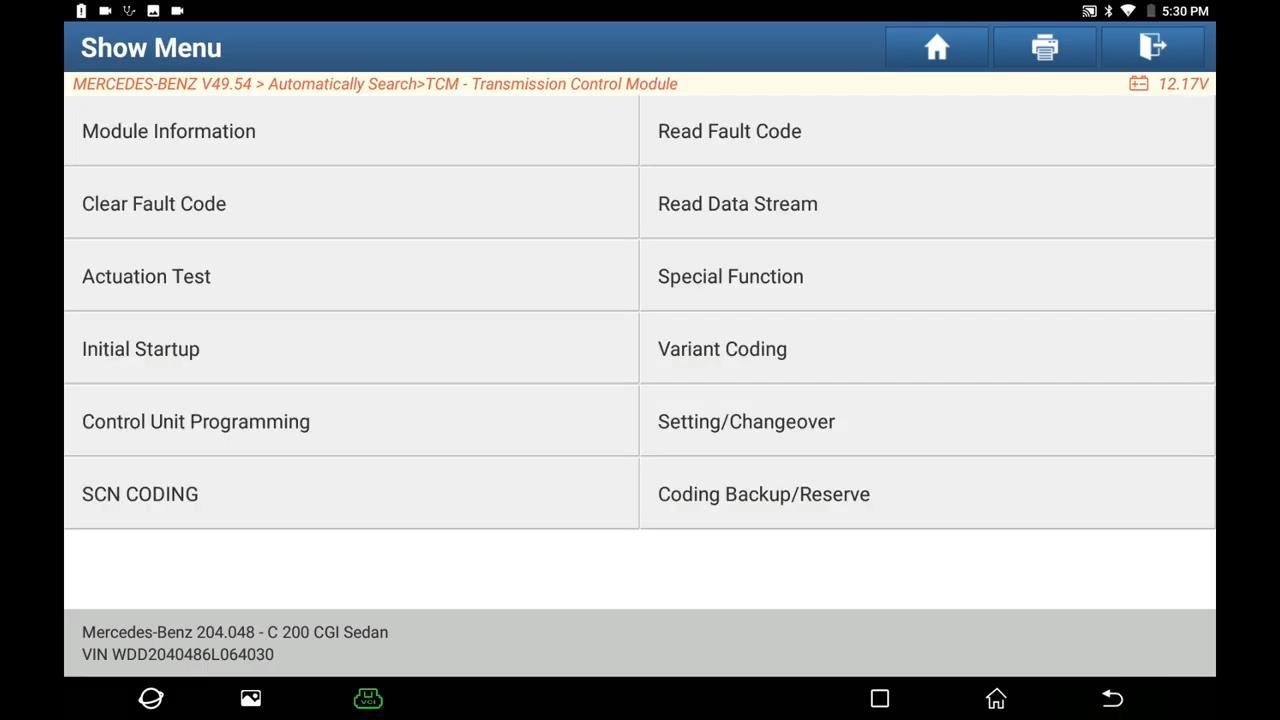
TCM – Transmission Control Module – Special Function
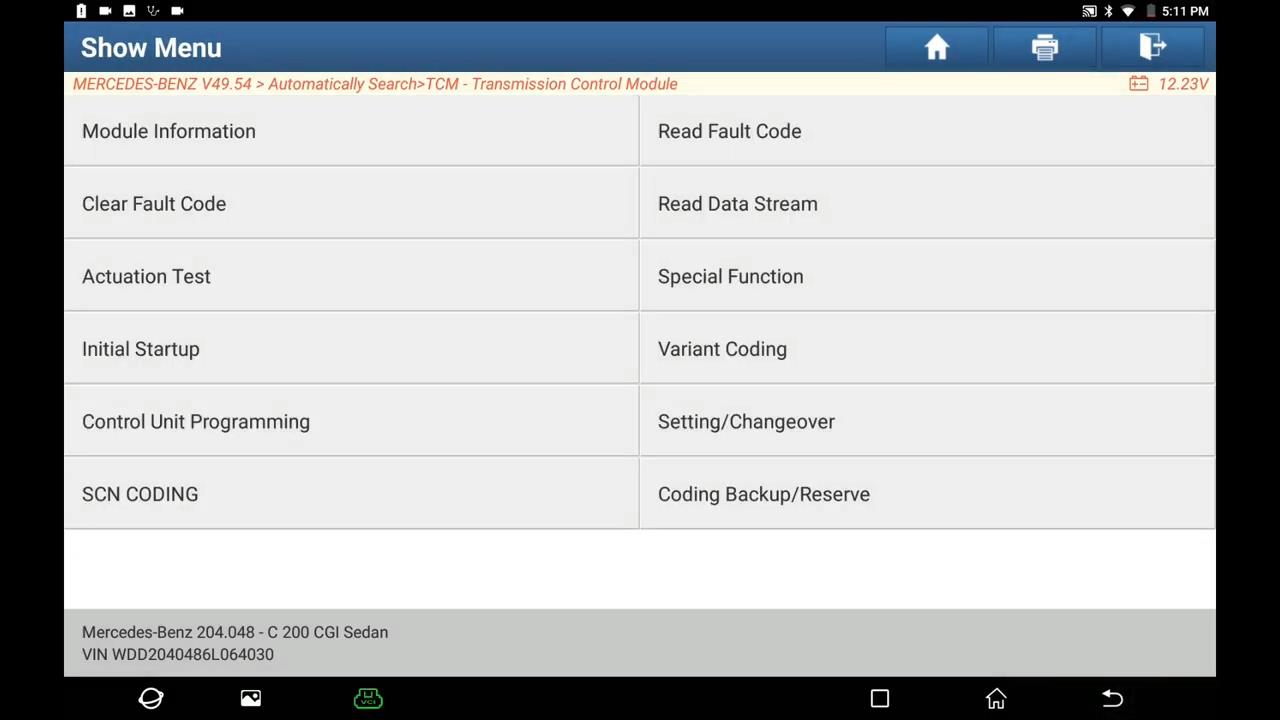
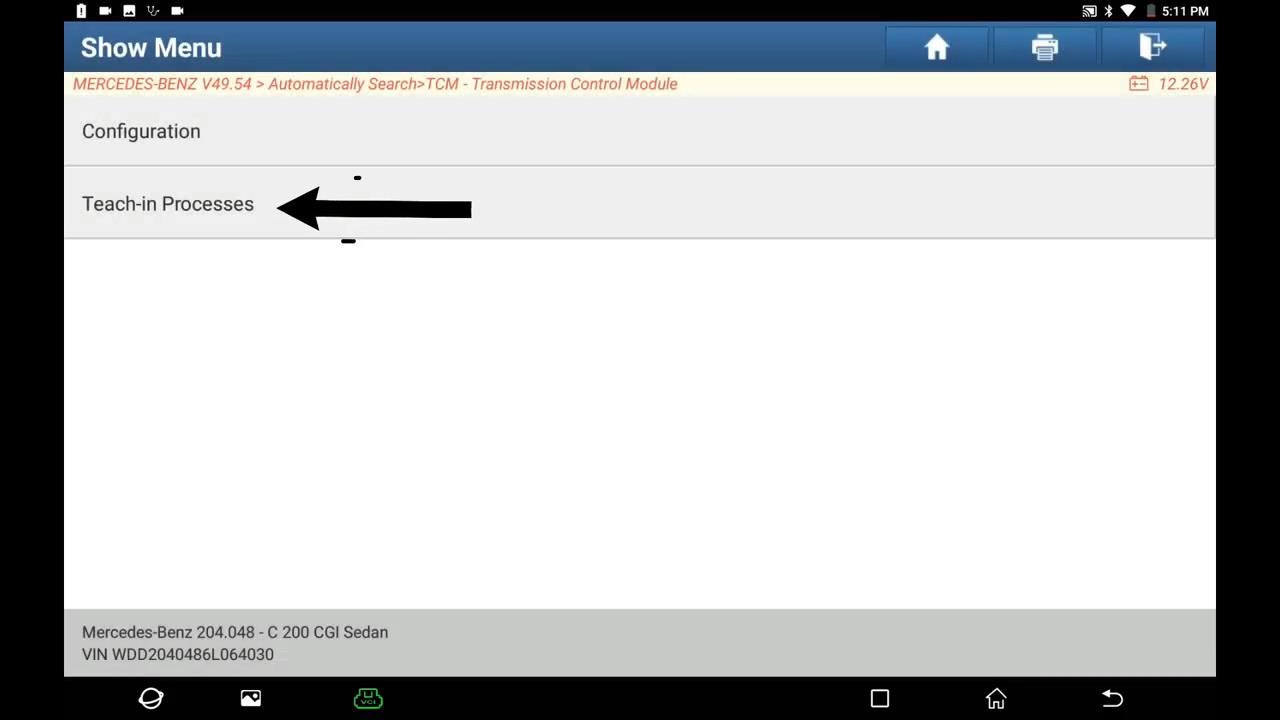
launch-x431-benz-w204-tcm-programming-9
launch-x431-benz-w204-tcm-programming-10
launch-x431-benz-w204-tcm-programming-11

Teach-in Process.

launch-x431-benz-w204-tcm-programming-12

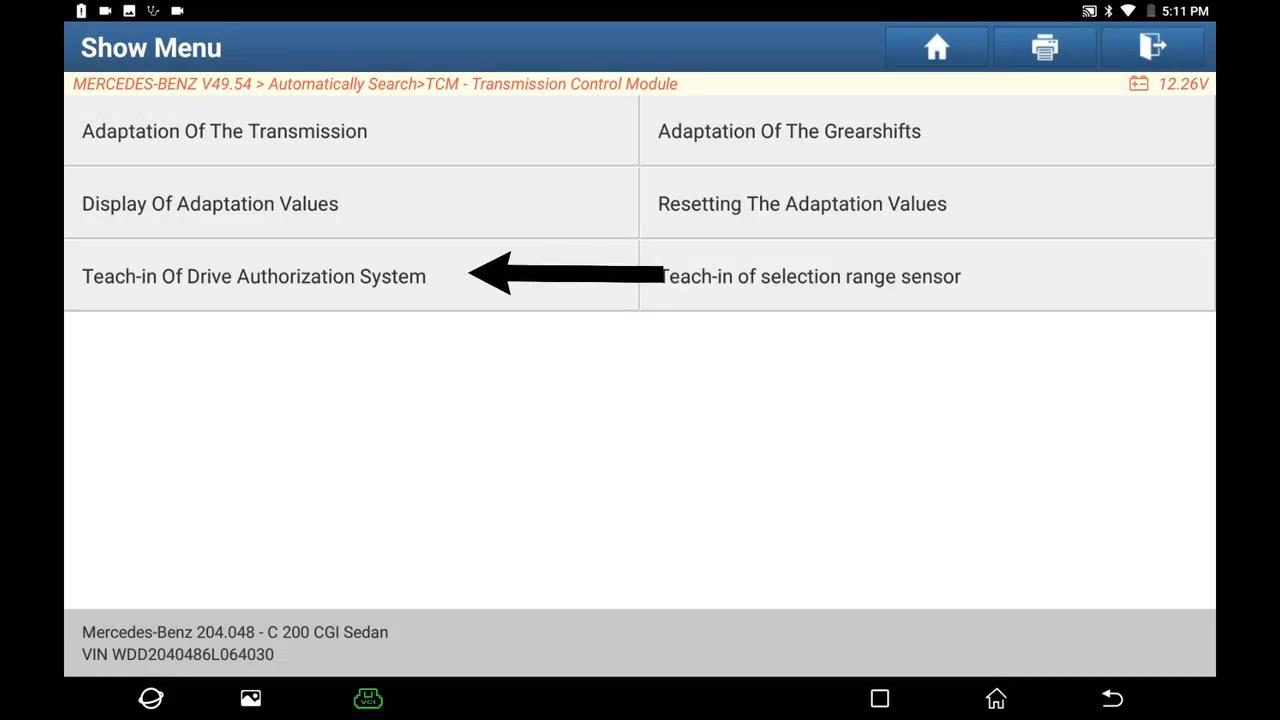
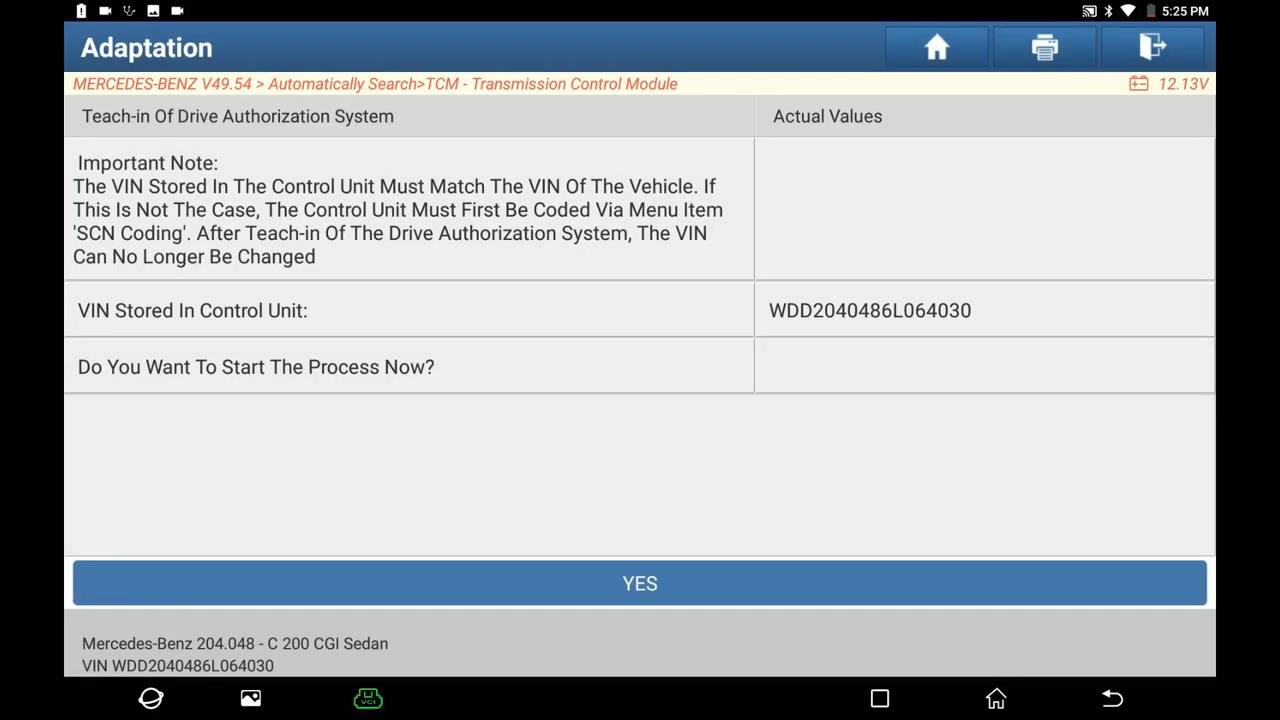
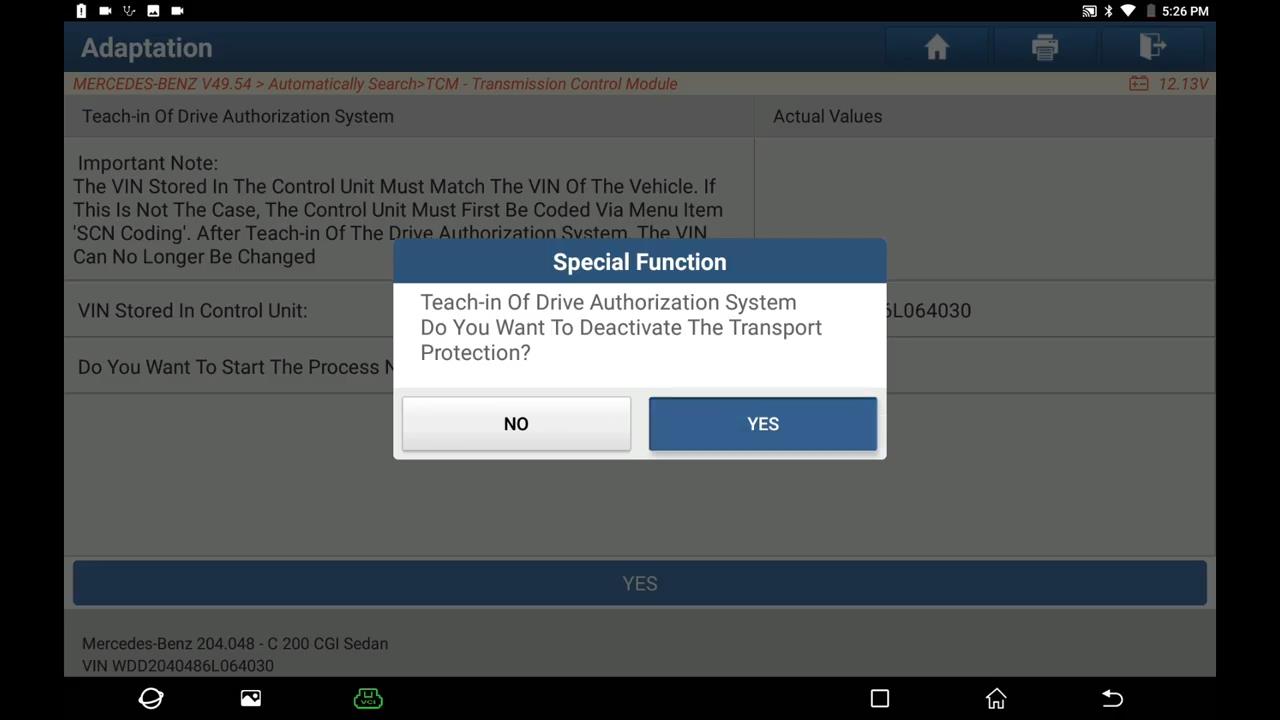
Teach-in of drive authorization system.
There are 3 steps:

Deactivate transport protection

Personalization

Activation

Caution!

When the ‘activation’ step is performed, the control unit is permanently assigned to this vehicle.

All three steps are required for commissioning of the control unit.

launch-x431-benz-w204-tcm-programming-13

Click on “OK”.

launch-x431-benz-w204-tcm-programming-14

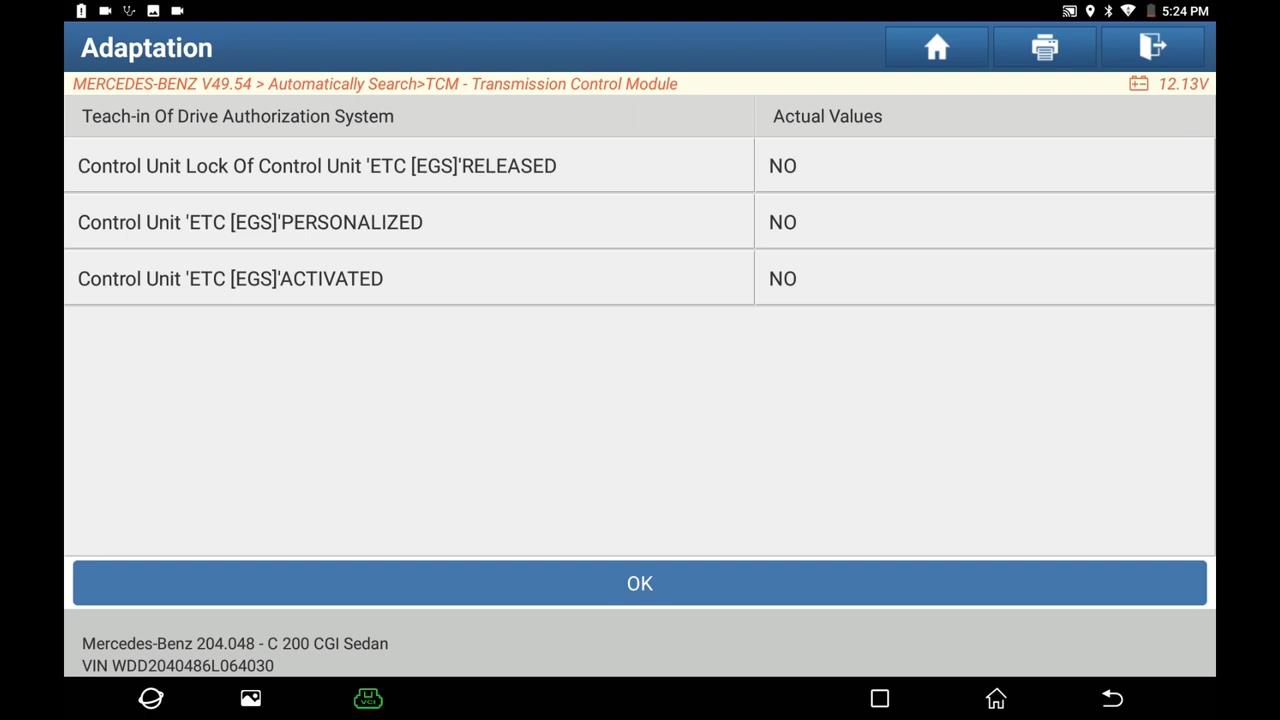
Click on “Yes” -> Yes -> Yes -> Yes.

launch-x431-benz-w204-tcm-programming-15

Okay, re-enter to double check: click on “Teach-in of drive authorization system” -> Yes -> and all value display “Yes”, click “OK”.

launch-x431-benz-w204-tcm-programming-16
launch-x431-benz-w204-tcm-programming-17

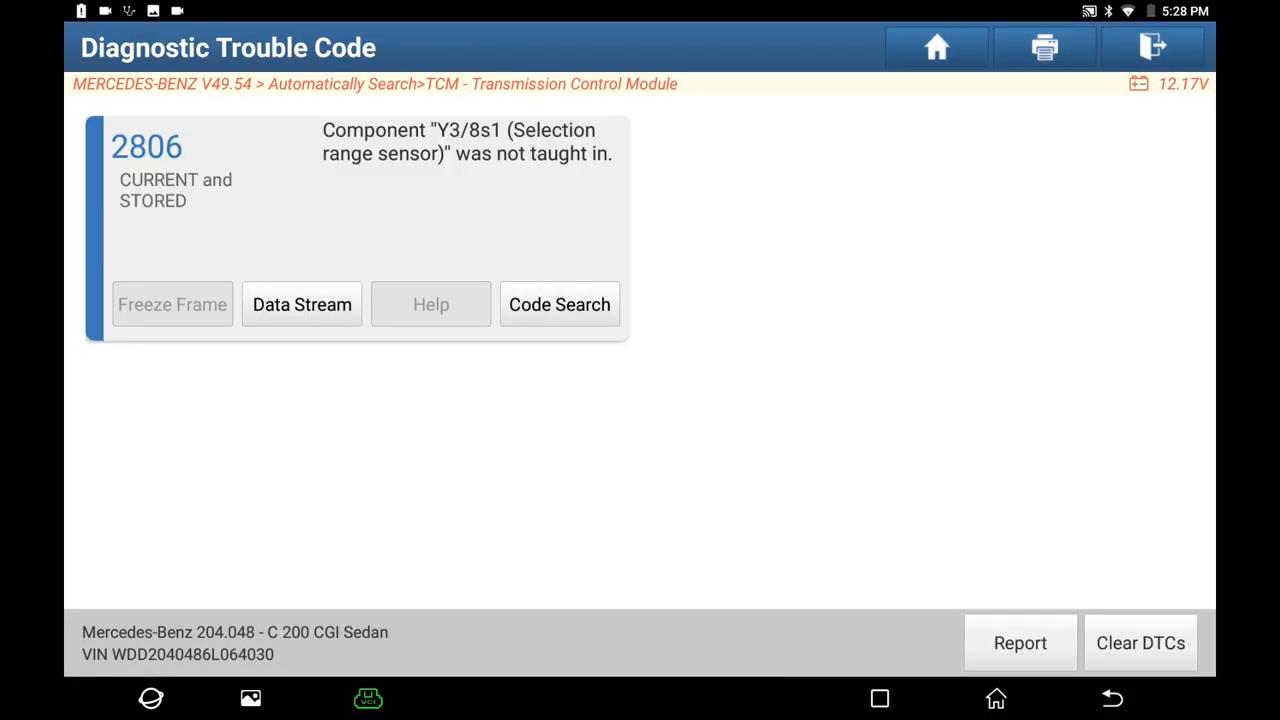
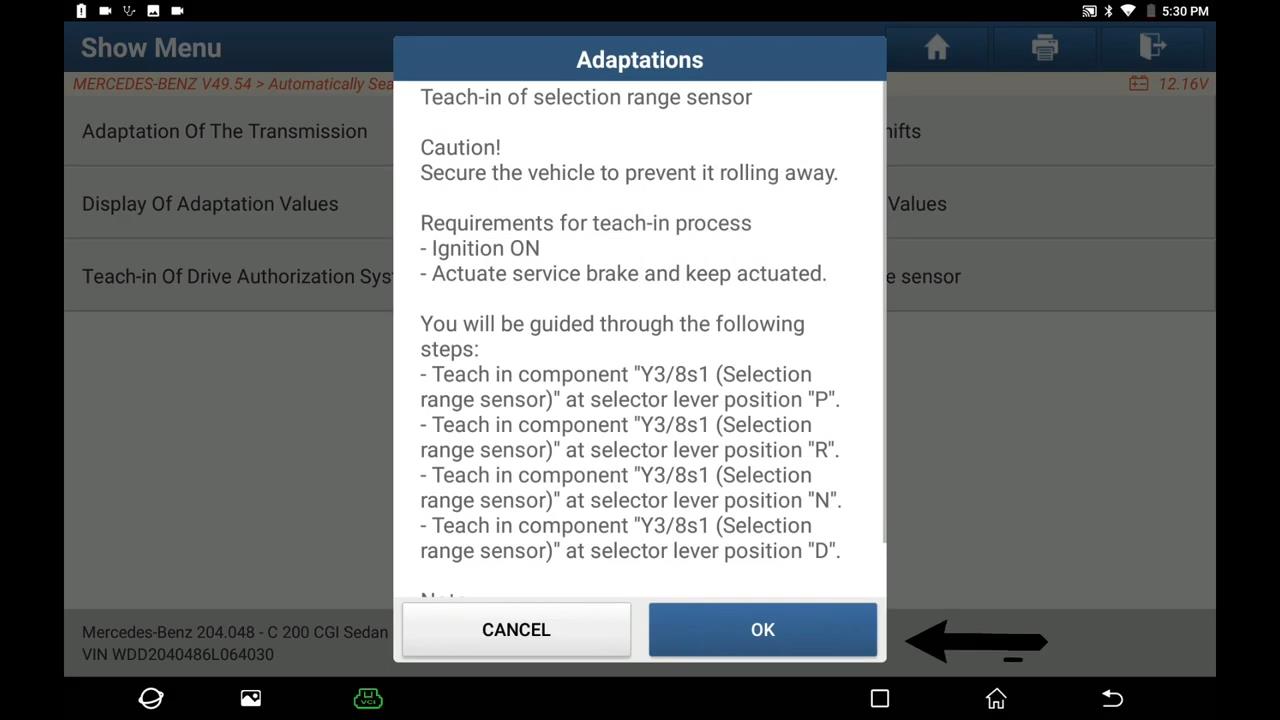
Teach-in selection Range Sensor.
Path: Teach-in selection Range Sensor ->Read fault code -> Special function -> Teach-in processes

launch-x431-benz-w204-tcm-programming-18
launch-x431-benz-w204-tcm-programming-19
launch-x431-benz-w204-tcm-programming-20

Adaptations, click on “Ok”.

launch-x431-benz-w204-tcm-programming-21

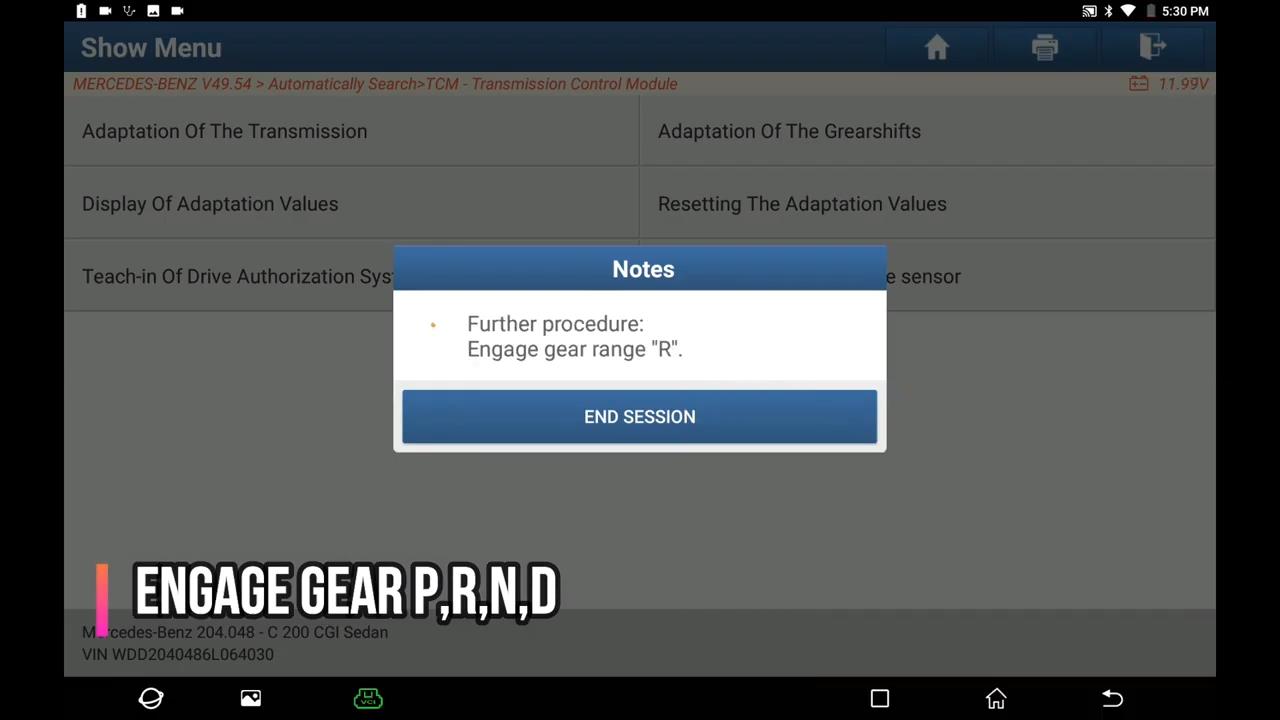
Engage gear P,R,N, D

launch-x431-benz-w204-tcm-programming-22

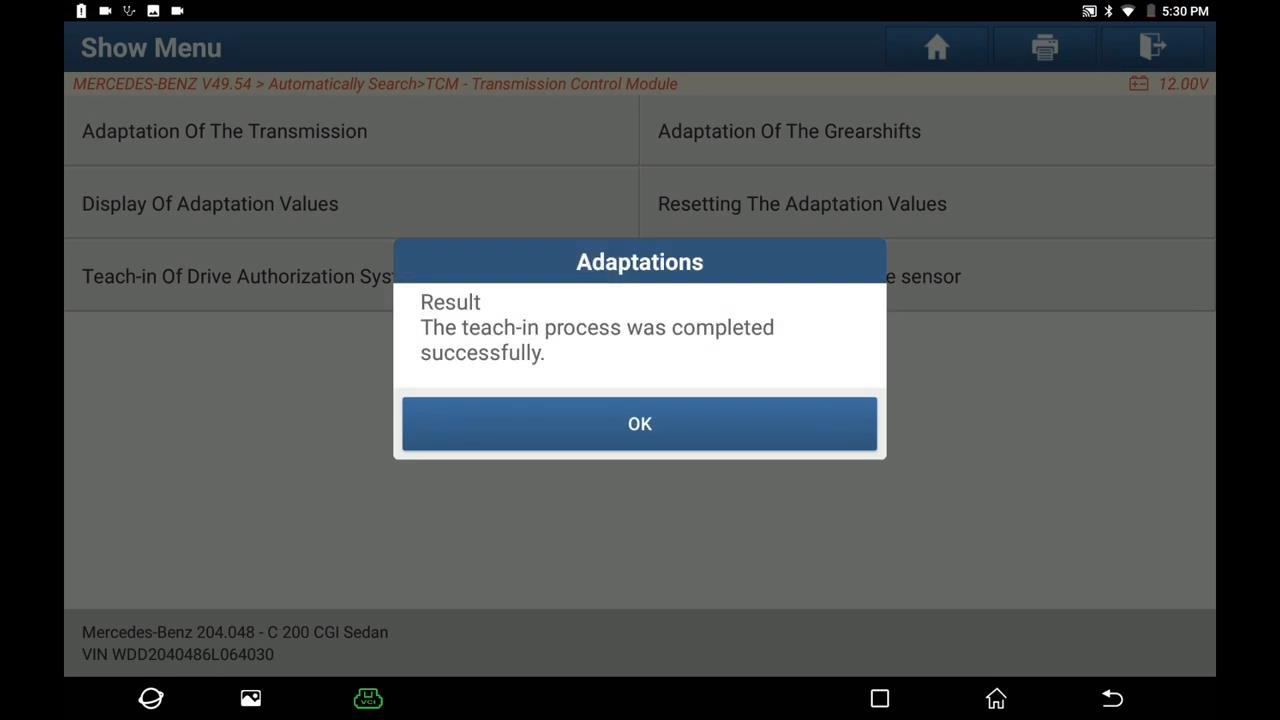
Result: the teach-in process was completed successfully.

launch-x431-benz-w204-tcm-programming-23
launch-x431-benz-w204-tcm-programming-24

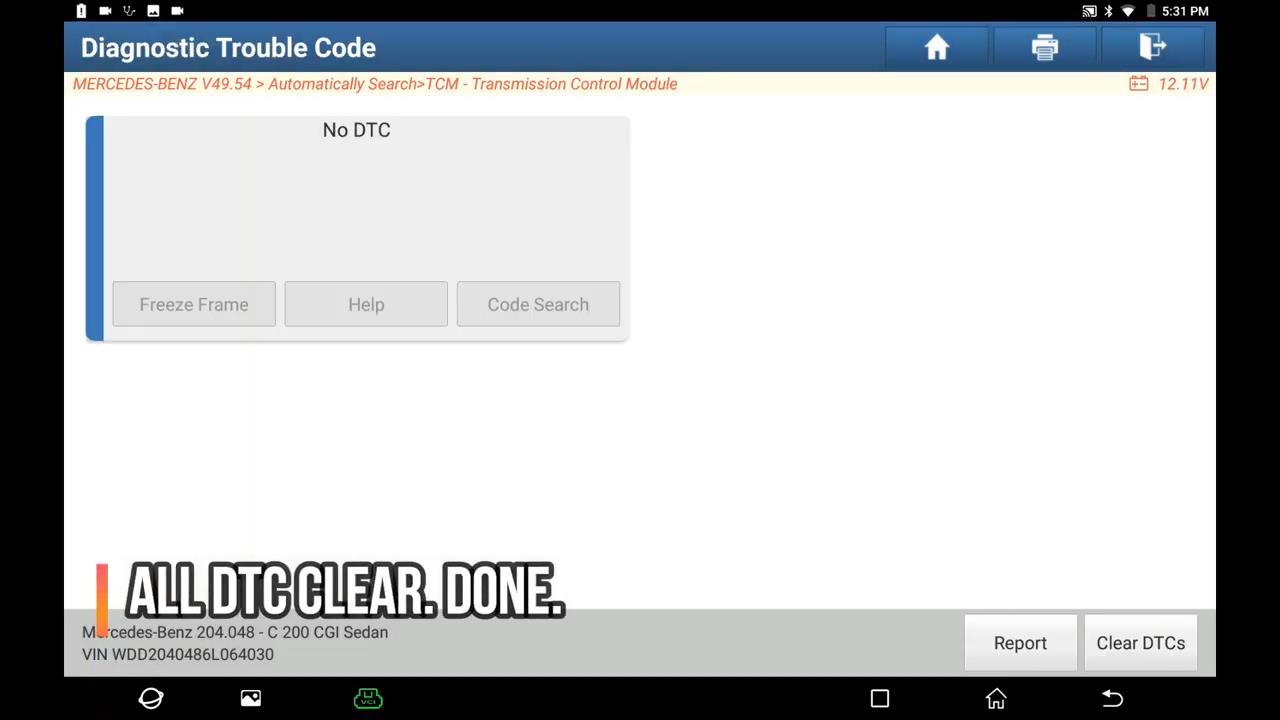
Ok, all DTC are cleared.

The job is done.

Thumb up Launch X431.

If you want to learn more about launch Scanner, please visit our website obd2tool.com

Comments

Popular posts from this blog

Xprog 6.12 5.84, 5.74, 5.60, 5.55, 5.51, 100% Works Software Free Download

Free download the newest Xprog V6.12 , XPROG 5.84 , XPROG 5.74 , XPROG 5.60 , Xprog 5.55 and XPROG 5.51. 1.XPROG-M 6.12 free download: Link 1: https://mega.nz/#!625RxAqJ!Y7IInI5ZhG3titLMPnFOvALbOa2RHIp7ENG2o4PIzag Password: No need Link 2: https://share.weiyun.com/5m5Vkw0 Password: fxo5qz Xprog 6.12 XPROG V6.12 installation video: XPROG-M V6.12 Using tips and installation guide: https://www.obd2tool.com/blog/2020/02/29/how-to-use-and-install-xprog-v6-12-on-win-xp-win7win8/ 2. XPROG V5.84 free download: https://mega.nz/#!7vpDwQ4D!MrdDW0tVf-6-wXtGKqpUmj7CA2HFlFlMf5AeNvYgRbI Tips for installing Xprog V5.84. 1.Disable anti-virus program when downloading software and running software. 2.Uninstall all the software and USB drivers of the old version xprog-box on your computer, then install the new XPROG5.84 software. 3.Run 5.84 Regsisty program for several timeswhen installing software 4.Run 5.84 Regsisty file for 2 times before you run software everytime . ...

How to setup BMW ISTA/P Loader for ICOM A2 ENET cable K+DCAN adapter

The text here, as a user manual of BMW ISTA/P Loader / ICOM Emulator,  is aimed to help those puzzled with ISTA/P Loader setup for  ICOM A2 , ENET cable, K+DCAN  USB interface. Note: all info here not original, shared by a forum member So try at your own risk! Main content: Part 1 – Compatible device Part 2 – Latest ISTA/P Loader update information Part 3 – How to install ISTA/P Loader v4.x Part 4 – How to use  ISTA/P loader with ICOM A2, K+DCAN cable, ENET cable Part 5 – How to shut down ISTA/P Part 1 – Compatible device: ISTA/P Loader compatible with ICOM A2 (OEM or clone), K+DCAN USB and ENET   Part 2 – Latest ISTA/P Loader update information: NEWEST – ISTA/P Loader V4.8  update info: Free download BMW ISTA-P Loader V4.8.7 to get all new info yourself …… ISTA/P Loader V4.2 update info: Custom resolution option added Improved detection of bmw scan tool ISTA-P install location. Improved compatibility with windows 10 Code...

How to setup ICOM Next A WLAN connection

  ICOM Next  Wireless diagnostic 1.Set router wireless, wireless SSID name:ISAP,password:autosvs12345 2.Set ICOM NEXT A wireless, connected to the router, wireless SSID name:ISAP,password:autosvs12345, (Same as router setting, After setting the ICOM NEXT need to reconnect to vehicle) 3.BMW diagnostic PC connect to wireless router ISAP, you can start wireless diagnosis. 1.Configuration router 2.Configuration ICOM NEXT A 3.Same as the router configuration; 4.After ICOM NEXT configuration is completed, you need to reconnect, ICOM NEXT will automatically open the WLAN connection function; 5.Connect ISAP WIFI; 6.After the ISAP WIFI connection is successful, you can use the ISTA diagnostic test