Manual: How to do GM Tech 2 Scanner self test step-by-step
VCI self test
Keypad self test
CANdi self test
RS-232 self test
Follow the instruction in detail…
Part 1: Tech2 VCI self test

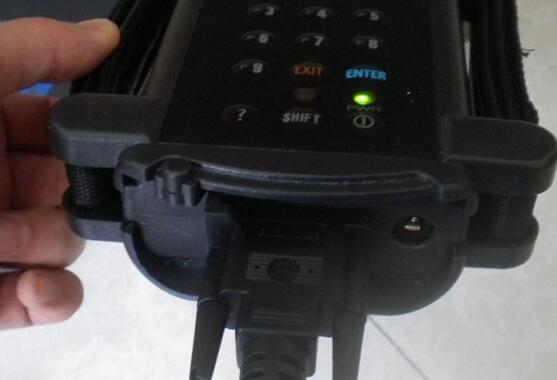
Insert the GM card

Connect the adapter and ready for the self test

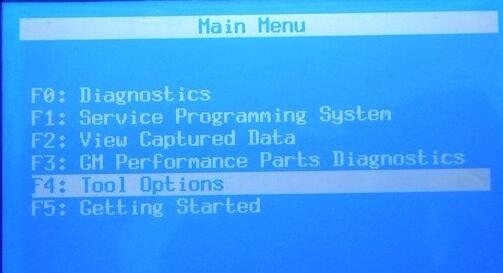
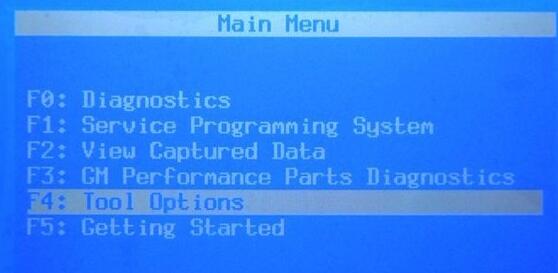
Go to the main menu and select F4: Tool options

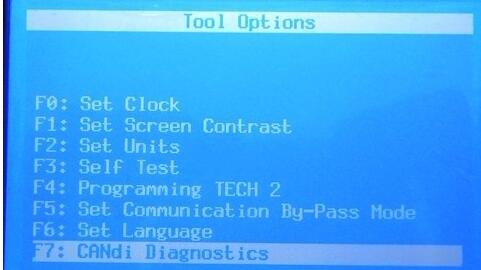
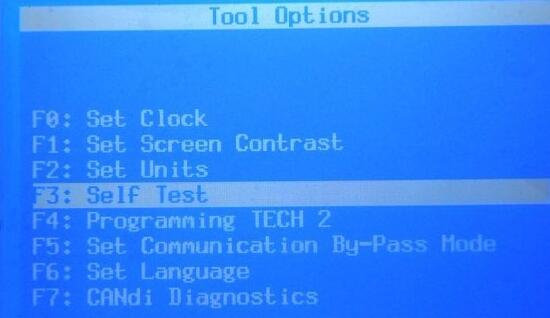
F3: Self test

Exit to continue

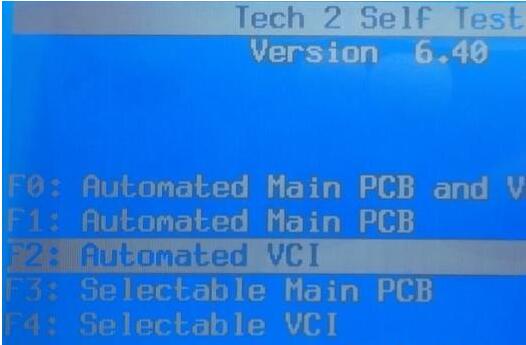
Select the function for self test

Here, press F2: Automated VCI

The VCI module self test result
Passed VCI selftest.
Part 2: GM Tech II Keypad self test

Go to the Tech 2 menu and select F4: Tool options

Then F3: Self test

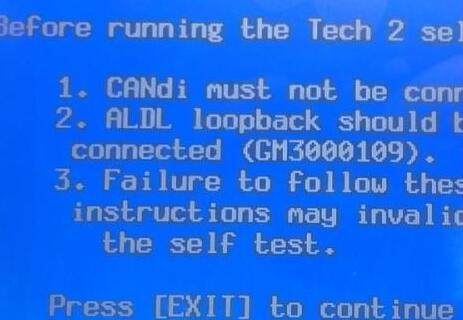
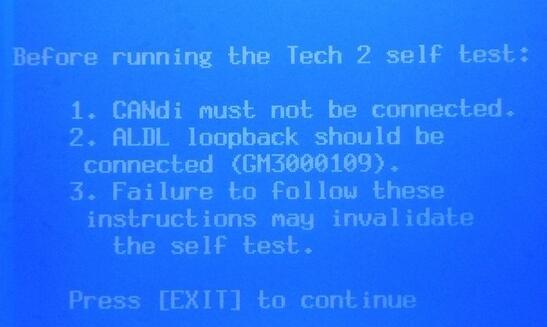
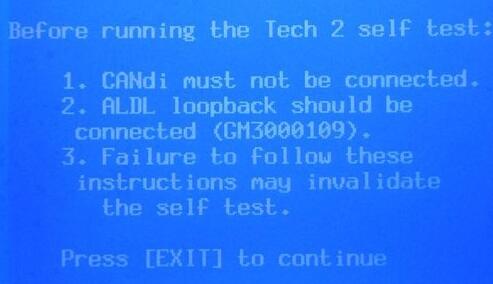
Before running the Tech 2 self test:
(1) Candi cannot be connected
(2) Aldl loopback should be connected (GM3000109)
(3) Failure to follow these instructions may invalidate the self test

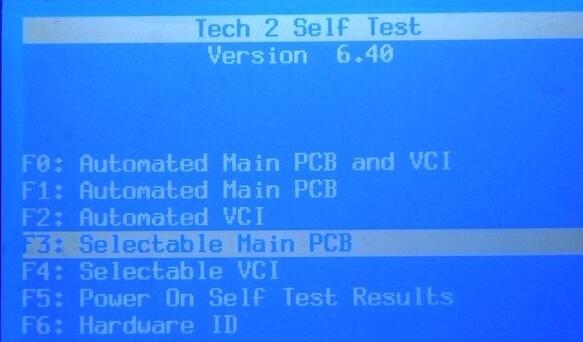
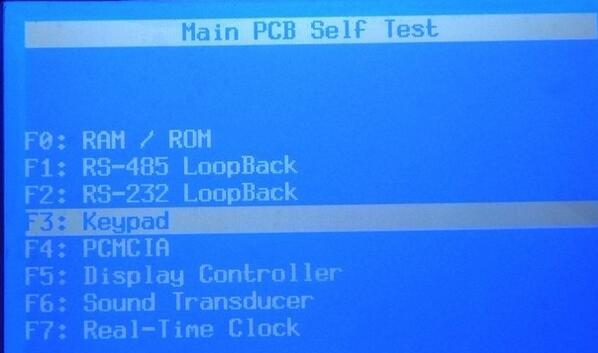
F3: Selectable main pcb

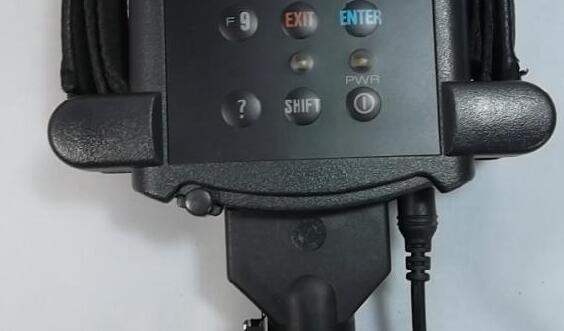
Press Keypad

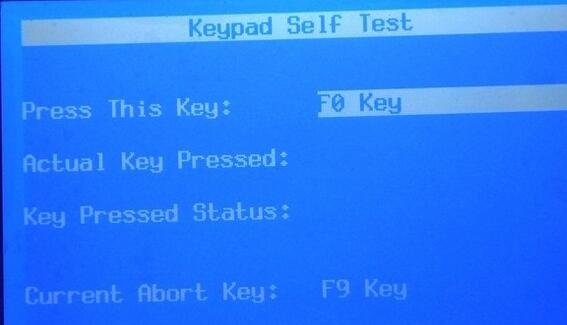
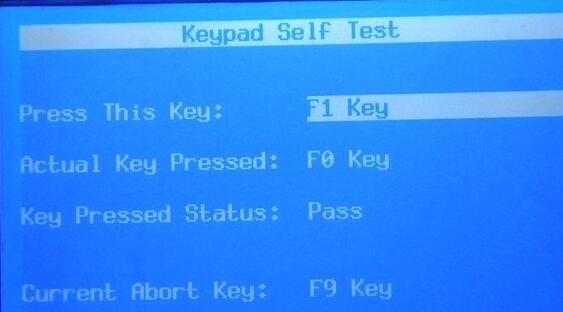
And press key

Note: In the last image, the actual key pressed is F0 and the final result is PASS – that’s normal
When you test the keypad, press F0-F1-F2-F3-F4-F5-F6-F7-F8-F9-EXIT-ENTER-in a good order! DO NOT SKIP ANY ONE.
Part 3: Tech 2 scan tool CANDI module self test
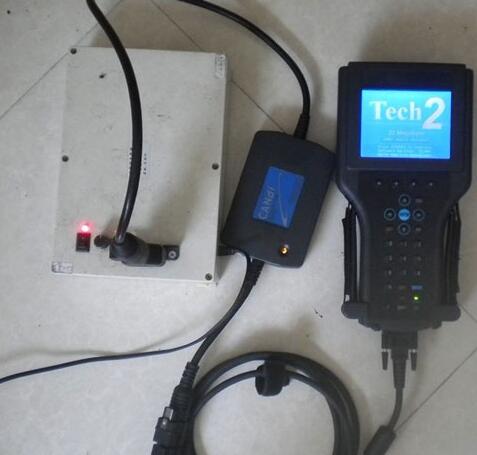
VERY IMPORTANT: Pls make sure of the connection of the OBD adapter, OBD main cable, CANdi module, Tech 2 scan tool and the power supply — ALL should be good
The power should be connected by the OBD port for CANdi self test.


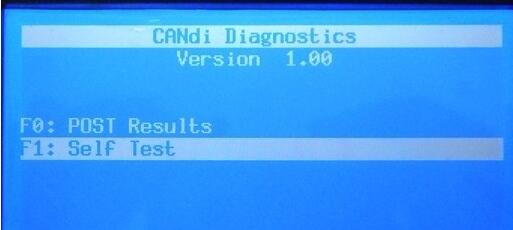
F4: Tool options

F7: CANdi diagnostics

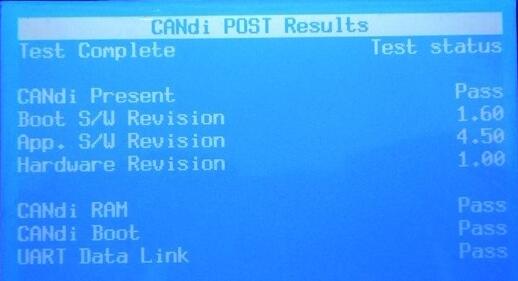
F0: POST result

Test status

F1: Self test

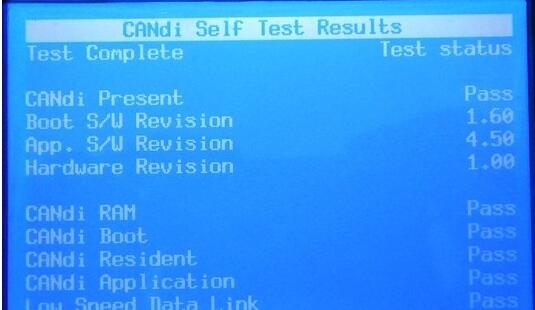
CANdi self test result
Pass selftest
There are two test results for CANdi module.

The one is Figure 8, and the other is Figure 10.
Part 4: GM Tech2 scanner RS232 self test

Check the connection before R232 self test

F4: Tool options

F3: Self test

Exit to continue

F3: Selectable main PCB

F2: Rs-232 loopback

Rs232 test: Passed!
VCI self test
Keypad self test
CANdi self test
RS-232 self test
Follow the instruction in detail…
Part 1: Tech2 VCI self test
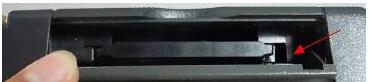
Insert the GM card
Connect the adapter and ready for the self test
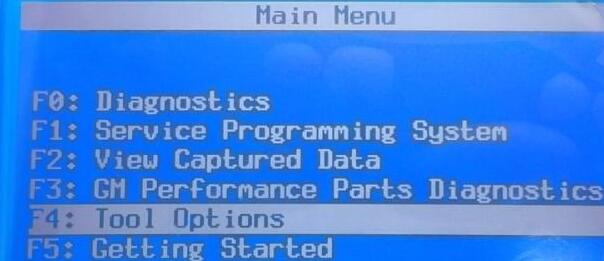
Go to the main menu and select F4: Tool options
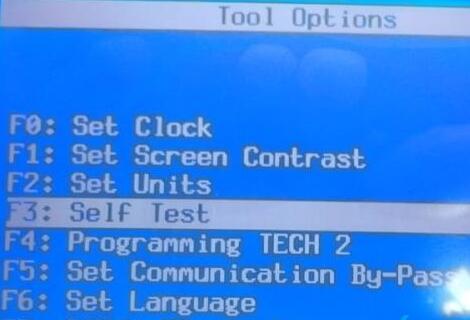
F3: Self test
Exit to continue

Select the function for self test
Here, press F2: Automated VCI

The VCI module self test result
Passed VCI selftest.
Part 2: GM Tech II Keypad self test

Go to the Tech 2 menu and select F4: Tool options

Then F3: Self test
Before running the Tech 2 self test:
(1) Candi cannot be connected
(2) Aldl loopback should be connected (GM3000109)
(3) Failure to follow these instructions may invalidate the self test
F3: Selectable main pcb
Press Keypad
And press key
Note: In the last image, the actual key pressed is F0 and the final result is PASS – that’s normal
When you test the keypad, press F0-F1-F2-F3-F4-F5-F6-F7-F8-F9-EXIT-ENTER-in a good order! DO NOT SKIP ANY ONE.
Part 3: Tech 2 scan tool CANDI module self test
VERY IMPORTANT: Pls make sure of the connection of the OBD adapter, OBD main cable, CANdi module, Tech 2 scan tool and the power supply — ALL should be good
The power should be connected by the OBD port for CANdi self test.


F4: Tool options
F7: CANdi diagnostics
F0: POST result

Test status
F1: Self test
CANdi self test result
Pass selftest
There are two test results for CANdi module.
The one is Figure 8, and the other is Figure 10.
Part 4: GM Tech2 scanner RS232 self test

Check the connection before R232 self test
F4: Tool options
F3: Self test
Exit to continue
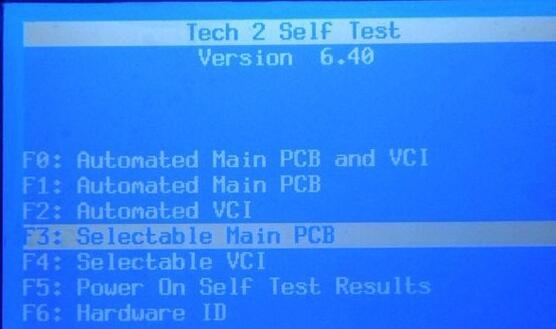
F3: Selectable main PCB
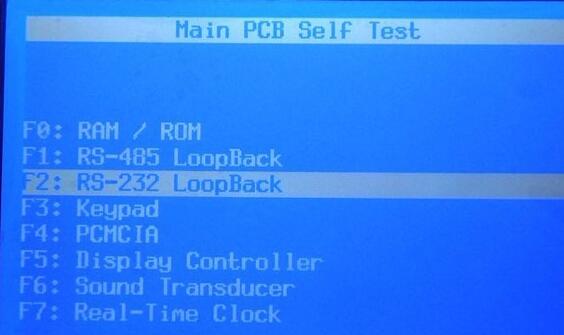
F2: Rs-232 loopback
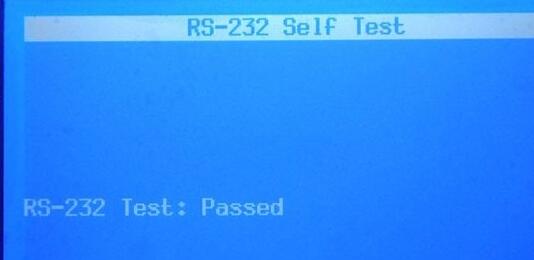
Rs232 test: Passed!
Comments
Post a Comment