Note:
Before update BMW ICOM A2 engineers version, please connect super ICOM A2 with your computer using internet cable, and supply power for perfect ICOM A2 using power adapter or connect with your vehicle.
Click the “ICOM ICOM A1 A2 super version 1.38 fixed update file” to extract to ICOM ICOM A1 A2 super version 1.38 fixed update file\.
Open the file “ICOM BMW A1 A2 super version 1.38 fixed update file”>”ICOM A2 super version 1.38 fixed update file”.

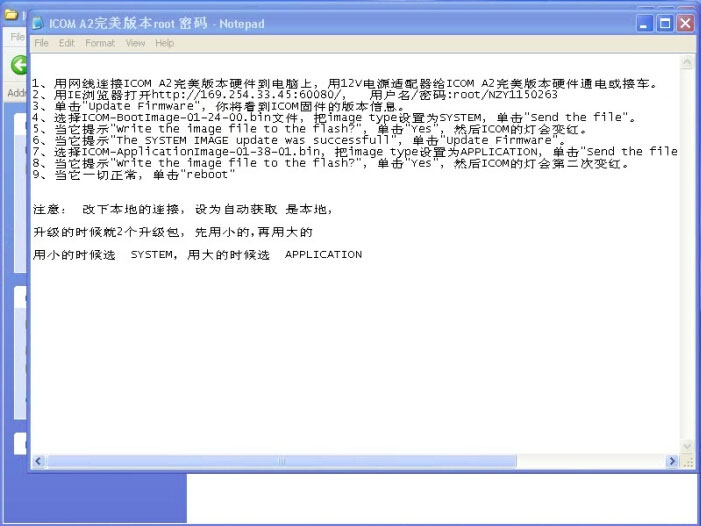
Open the Internet Explorer after opening the Notepad.

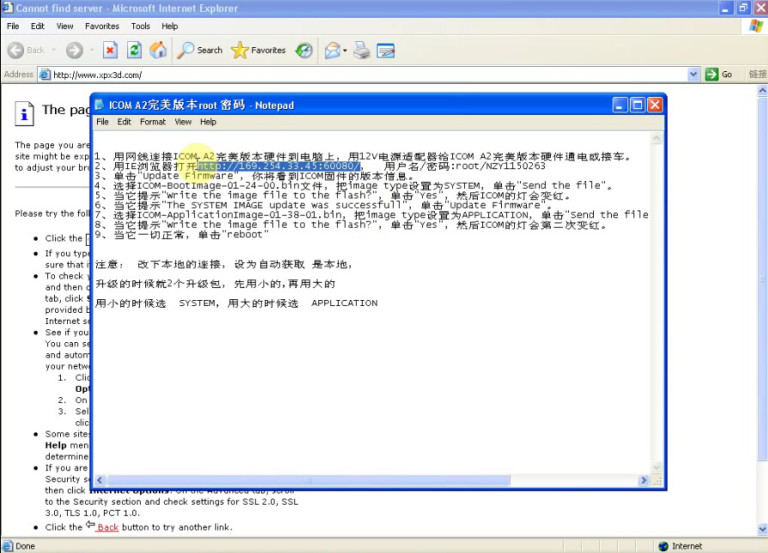
Copy the website: http://169.254.33.45:60080/ on the second line from the Notepad to the address on the web page.

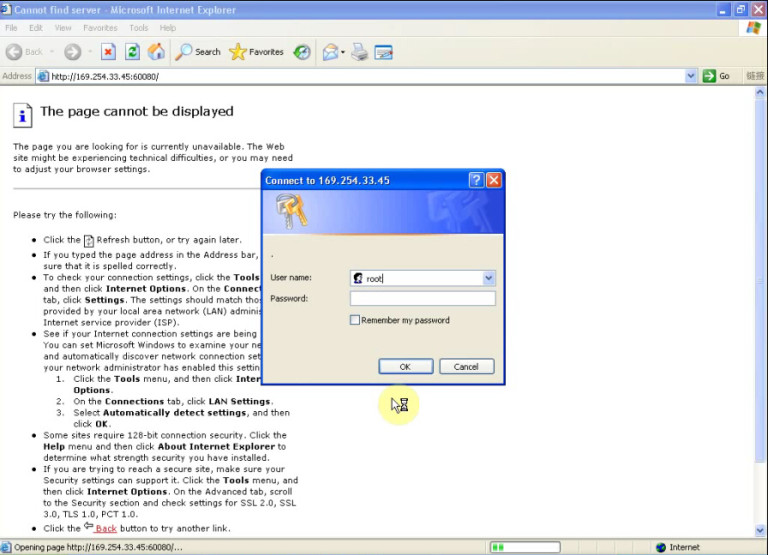
Fill in the user’s name and the password from the Notepad.

Choose “Update Firmware” when you come to the ICOM Manager page.
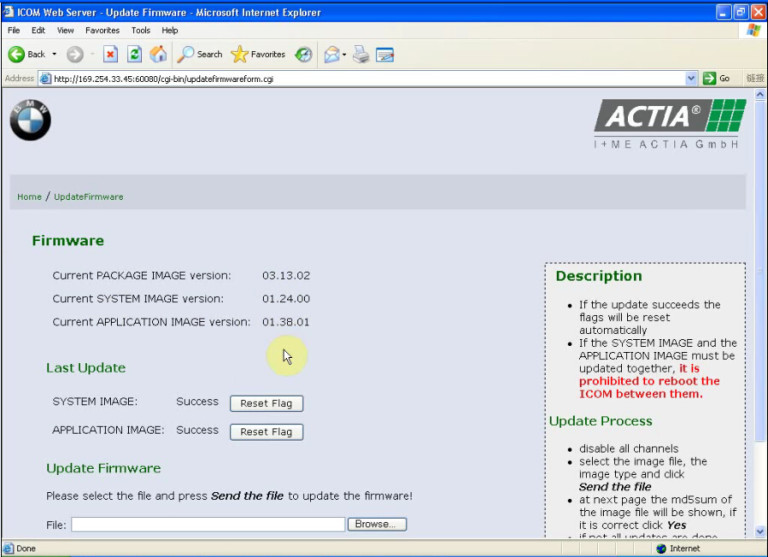
Scroll down the page to find “Update Firmware” part.
Click “Browse…” to choose files (Desktop> the file “Car Diagnostic Tool ICOM ICOM A1 A2 super version 1.38 fixed update file”> “ICOM ICOM A1 A2 super version 1.38 fixed update file”> “ICOM-BootImage-01-24-00”)

Click “Send the file” after you open “ICOM-BootImage-01-24-00”.
Choose “Yes” for “Write the image file to the flash?”
Click “Update firmware”.

Scroll down the page to find “Update Firmware” part.
Click “Browse…” to choose files (Desktop> the file “ICOM ICOM A1 A2 super version 1.38 fixed update file”> “ICOM ICOM A1 A2 super version 1.38 fixed update file”> “ICOM-Application-01-38-01”)

Choose “APPLICATION” on the image type and send the file.
Choose “Yes” for “Write the image file to the flash?”
Click “reboot”.

Then you will come to the car diagnostic scanner to find out the current PACKAGE, SYSTEM and APPLICATION IMAGE version.

http://cheapobd2tool.com/2017/09/07/instruction-for-update-perfect-bmw-icom-a2-firmware/
Before update BMW ICOM A2 engineers version, please connect super ICOM A2 with your computer using internet cable, and supply power for perfect ICOM A2 using power adapter or connect with your vehicle.
Click the “ICOM ICOM A1 A2 super version 1.38 fixed update file” to extract to ICOM ICOM A1 A2 super version 1.38 fixed update file\.
Open the file “ICOM BMW A1 A2 super version 1.38 fixed update file”>”ICOM A2 super version 1.38 fixed update file”.
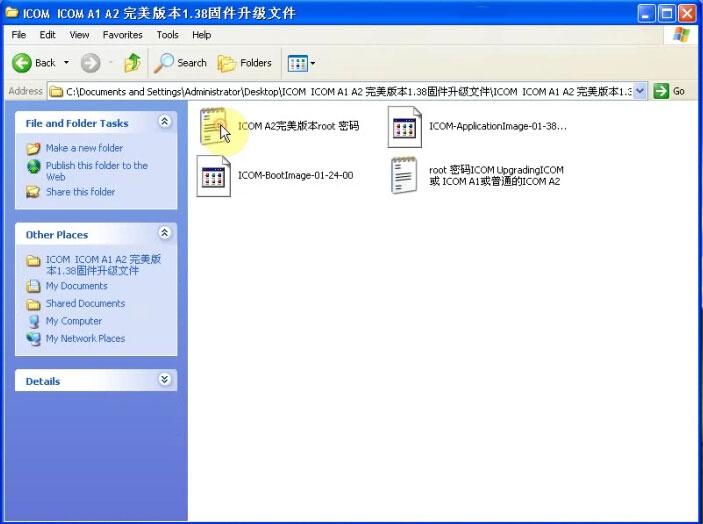
Open the Internet Explorer after opening the Notepad.
Copy the website: http://169.254.33.45:60080/ on the second line from the Notepad to the address on the web page.
Fill in the user’s name and the password from the Notepad.
Choose “Update Firmware” when you come to the ICOM Manager page.
Scroll down the page to find “Update Firmware” part.
Click “Browse…” to choose files (Desktop> the file “Car Diagnostic Tool ICOM ICOM A1 A2 super version 1.38 fixed update file”> “ICOM ICOM A1 A2 super version 1.38 fixed update file”> “ICOM-BootImage-01-24-00”)
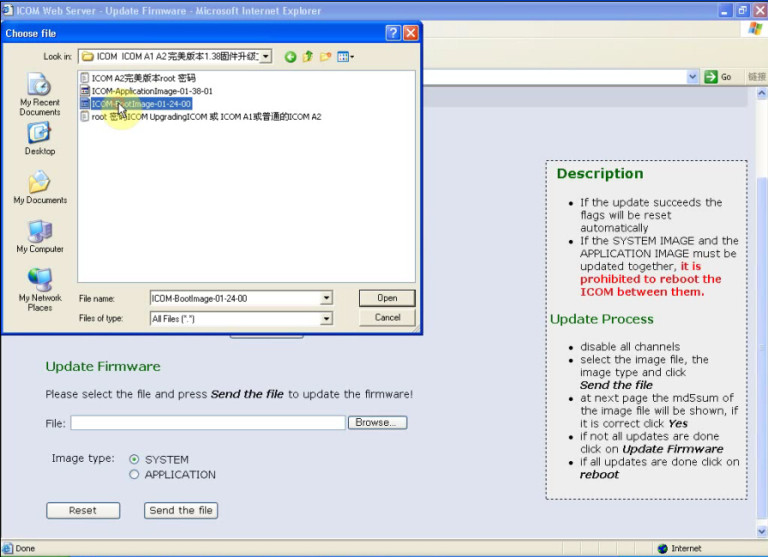
Click “Send the file” after you open “ICOM-BootImage-01-24-00”.
Choose “Yes” for “Write the image file to the flash?”
Click “Update firmware”.
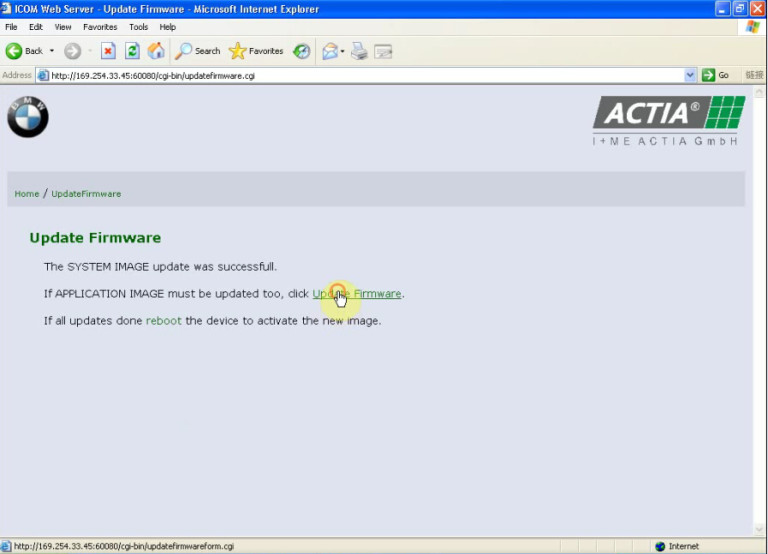
Scroll down the page to find “Update Firmware” part.
Click “Browse…” to choose files (Desktop> the file “ICOM ICOM A1 A2 super version 1.38 fixed update file”> “ICOM ICOM A1 A2 super version 1.38 fixed update file”> “ICOM-Application-01-38-01”)
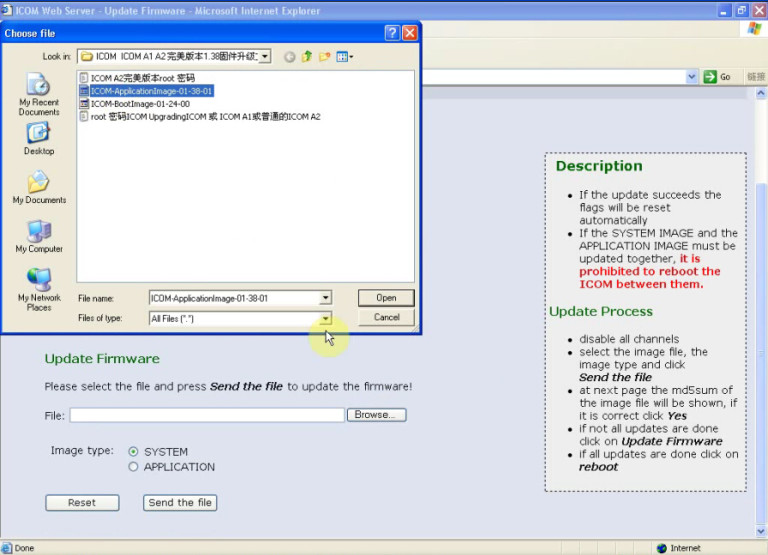
Choose “APPLICATION” on the image type and send the file.
Choose “Yes” for “Write the image file to the flash?”
Click “reboot”.
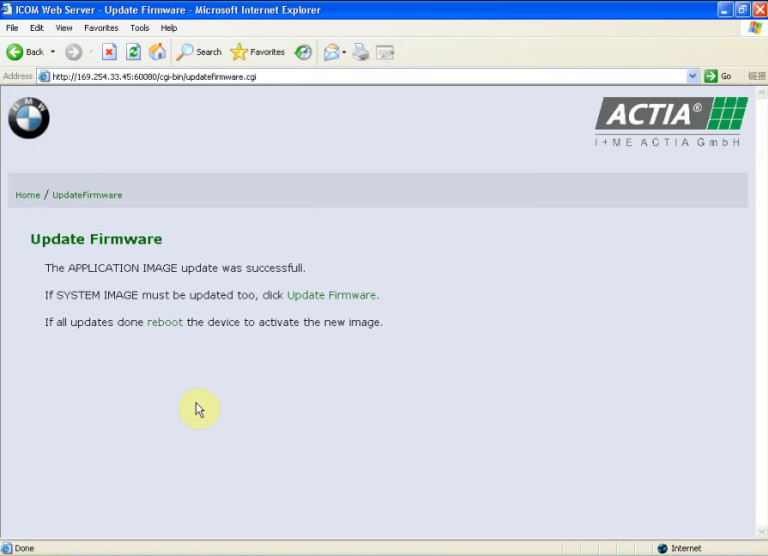
Then you will come to the car diagnostic scanner to find out the current PACKAGE, SYSTEM and APPLICATION IMAGE version.
http://cheapobd2tool.com/2017/09/07/instruction-for-update-perfect-bmw-icom-a2-firmware/
Comments
Post a Comment